Configuring OIDC with Keycloak
In this guide we will show you how to enable users to login to the Weave GitOps dashboard by authenticating them against a Keycloak instance.
This example uses Keycloak and assumes Weave GitOps has already been installed on the Kubernetes Cluster.
Pre-requisites
- A Kubernetes cluster
- Weave GitOps is installed and TLS has been enabled
- Access to a running Keycloak installation
Configuring a new Keycloak Realm
The first step is to create a new realm in Keycloak for our applications.
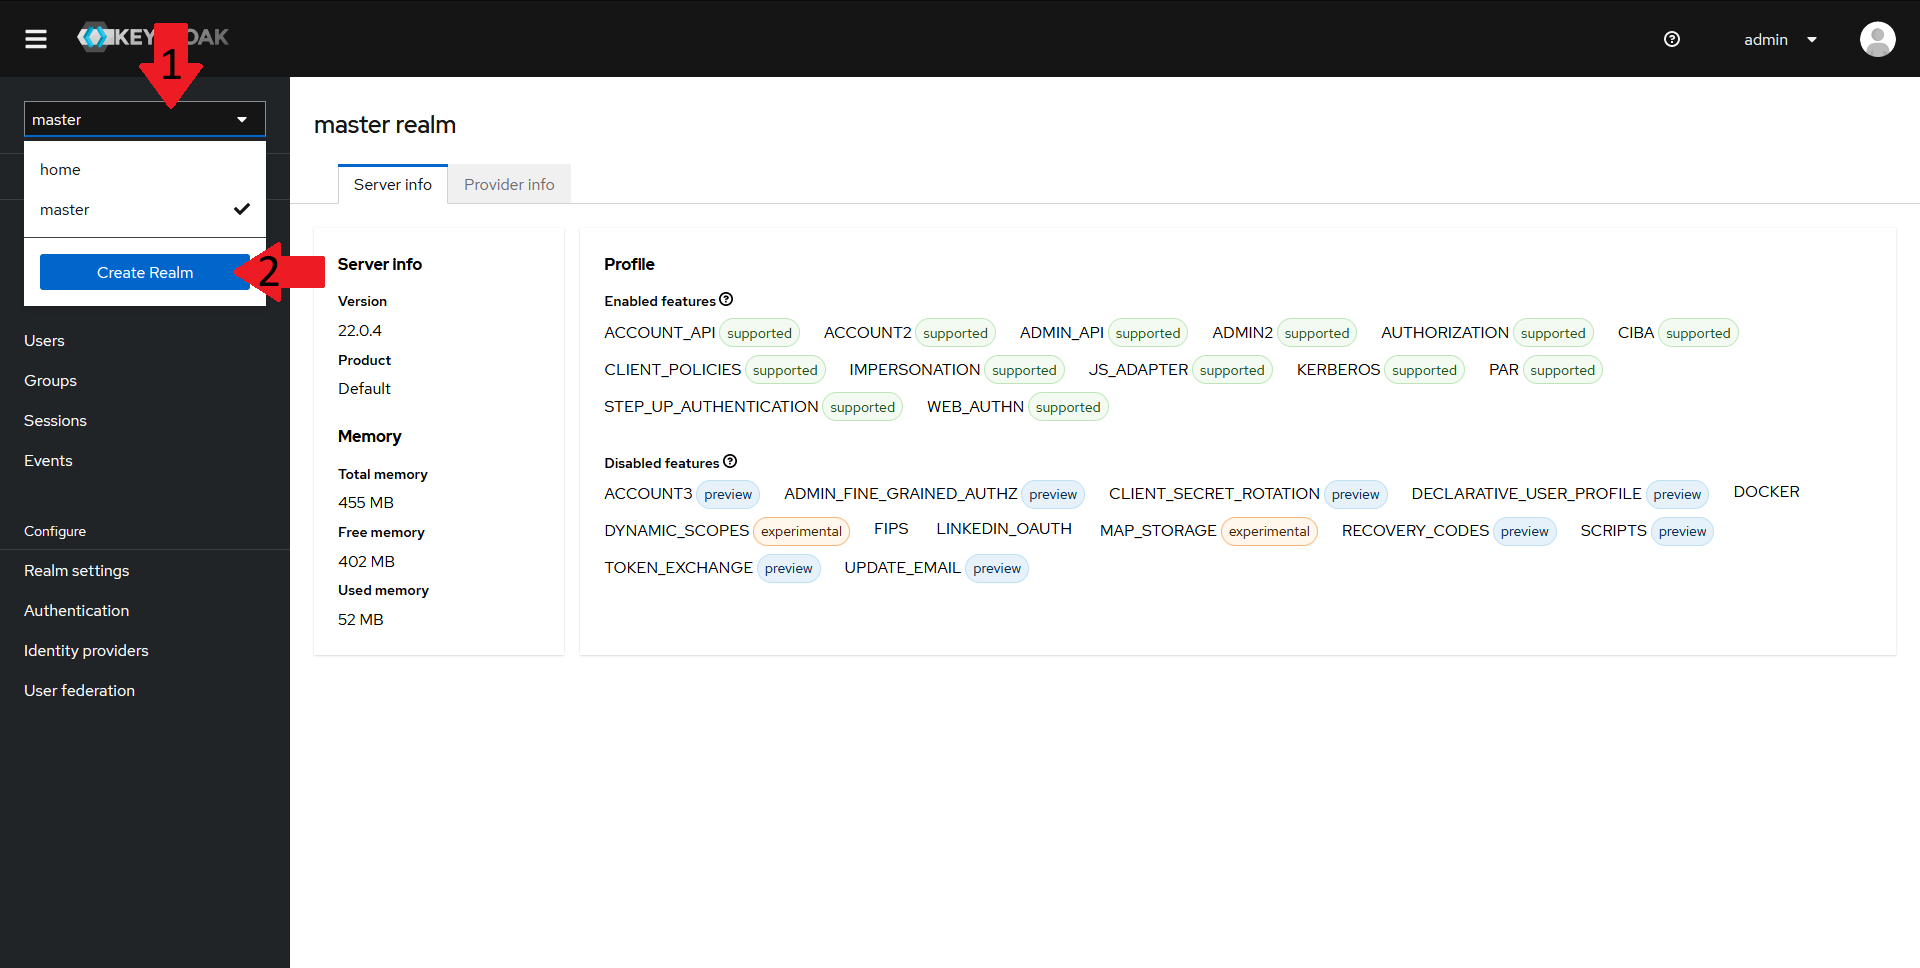
To do that, navigate to your keycloak admin console and:
- In the top left menu, select the realm dropdown
- Click on the
Create Realmbutton
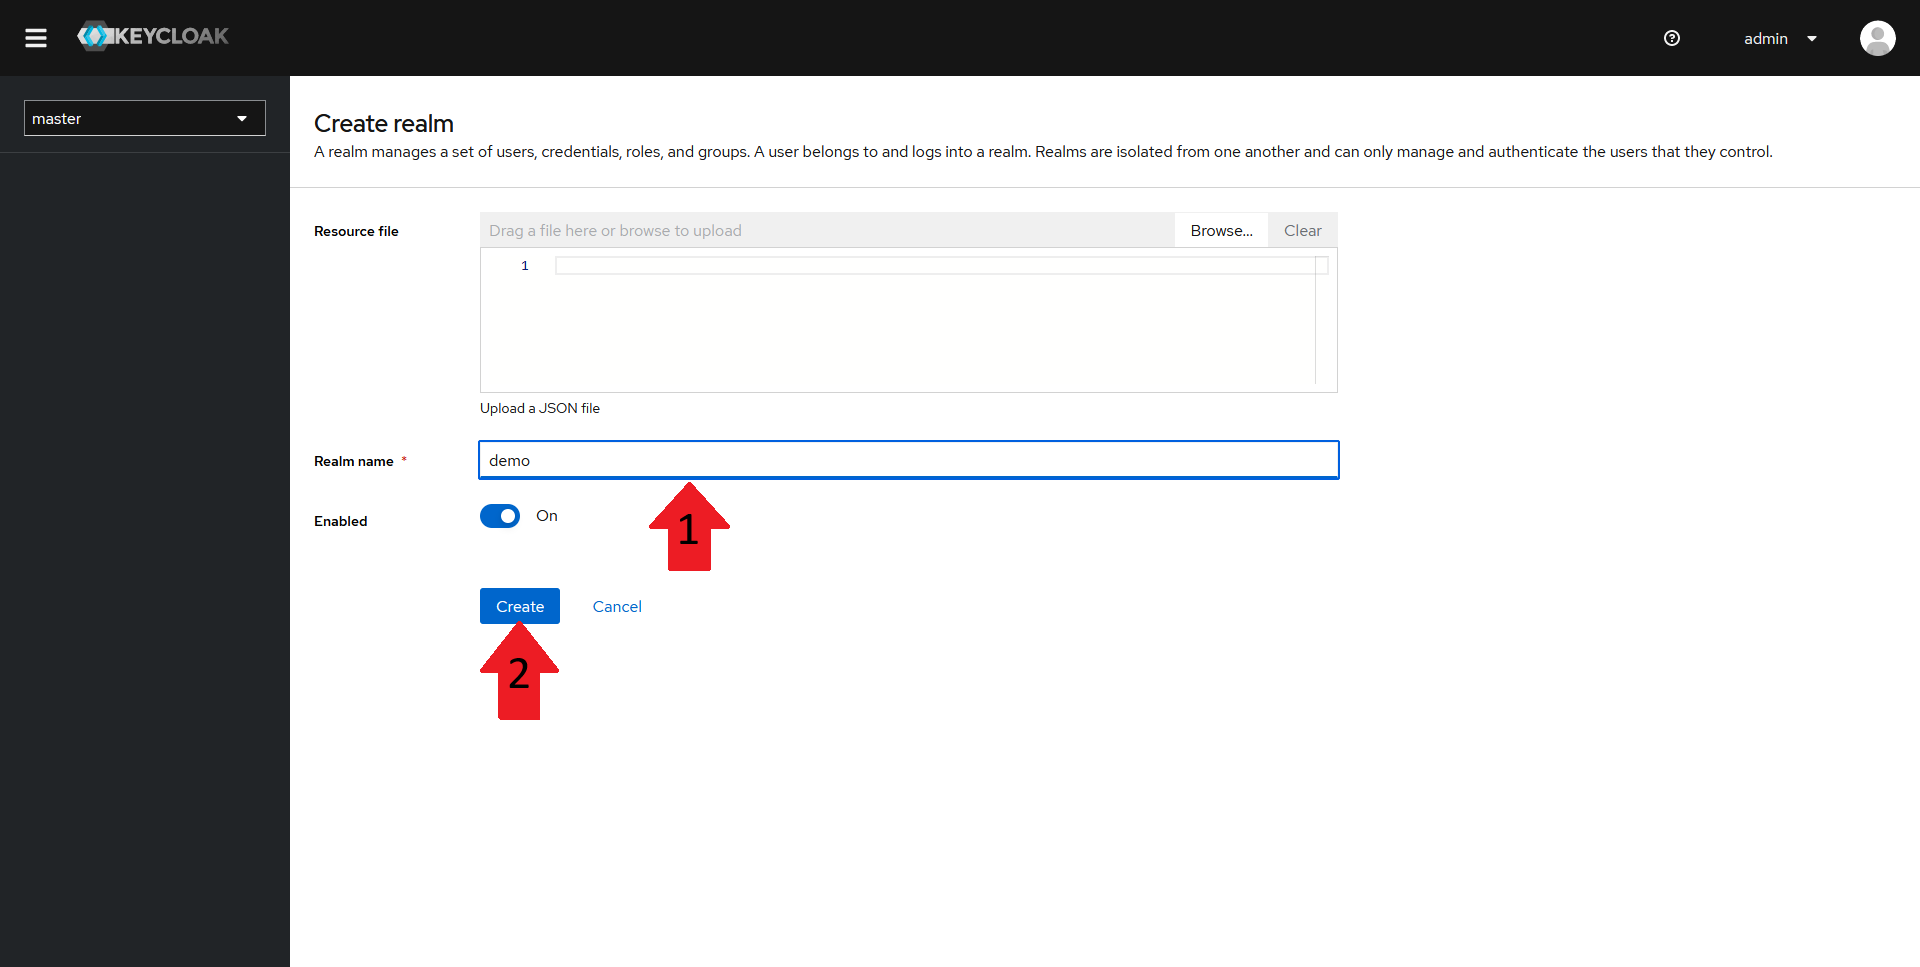
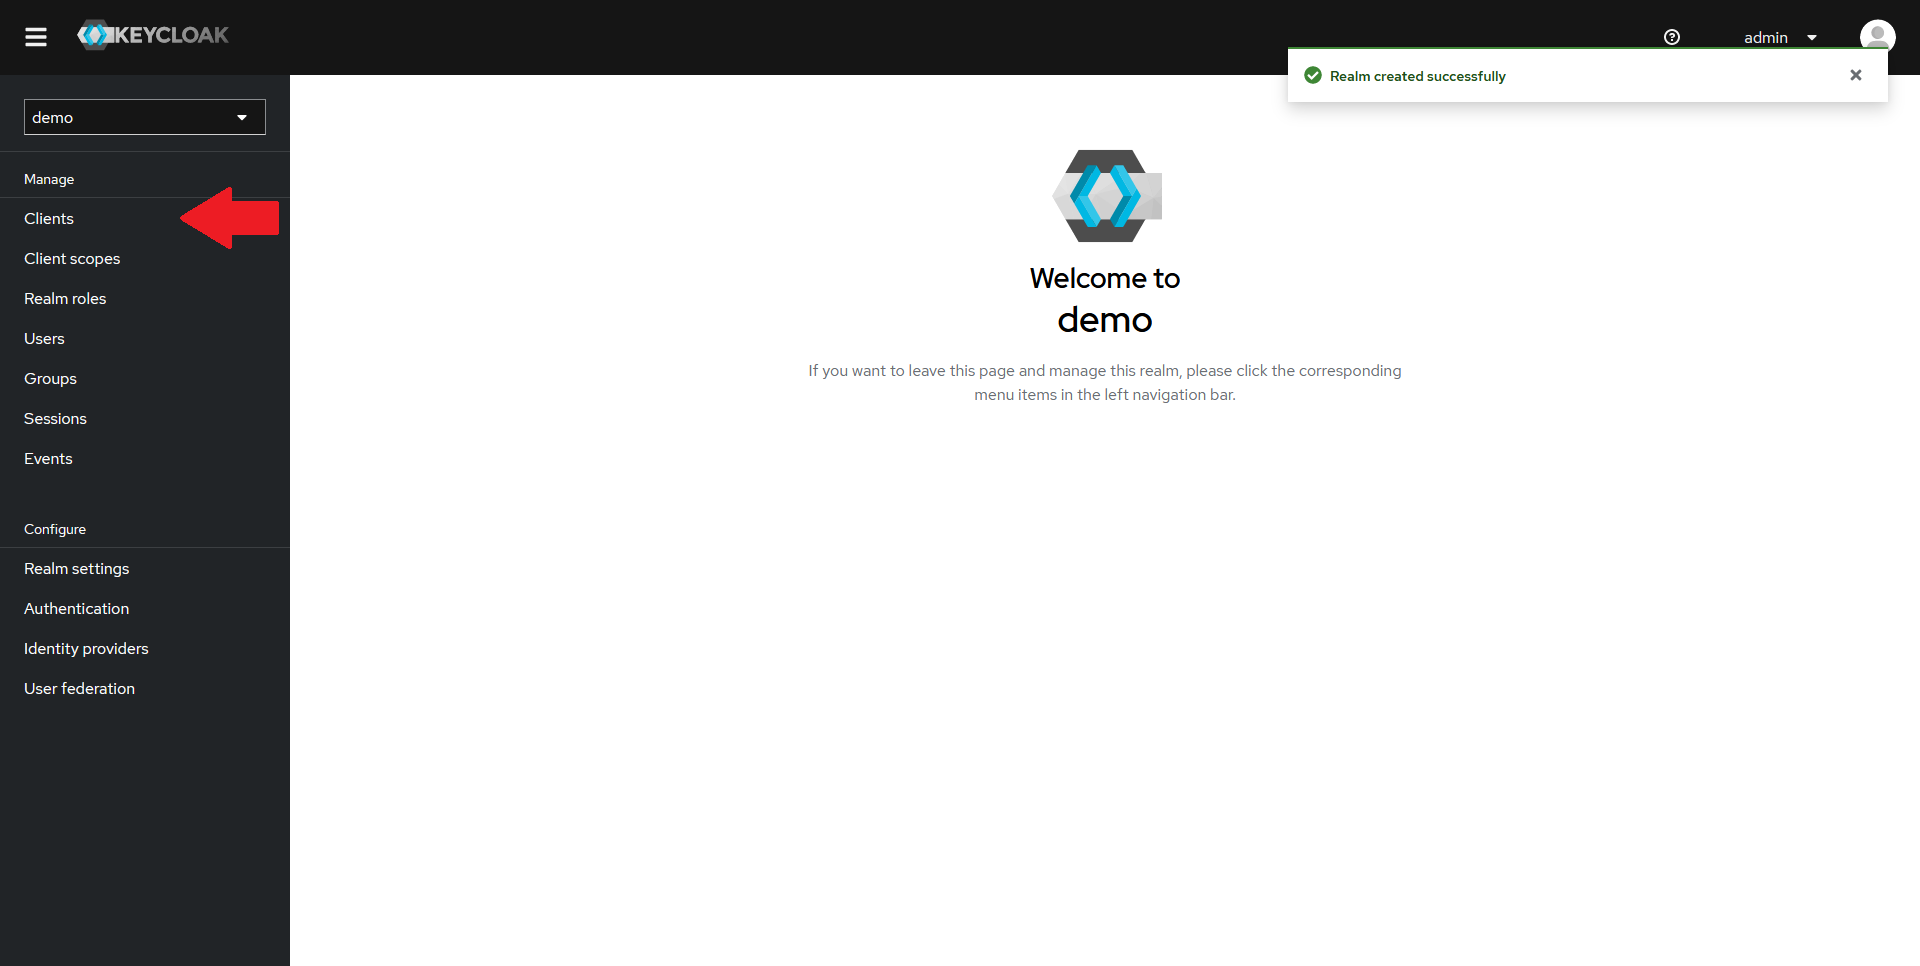
In the new window, fill in a name for your realm and then click on Create. In this guide, the realm will be named demo.
Creating a new Keycloak Client
You should now have a new realm created. Now onto creating the client.
From the Keycloak admin console, make sure the new realm is selected in the top-left dropdown, and click on the Clients tab in the left menu.
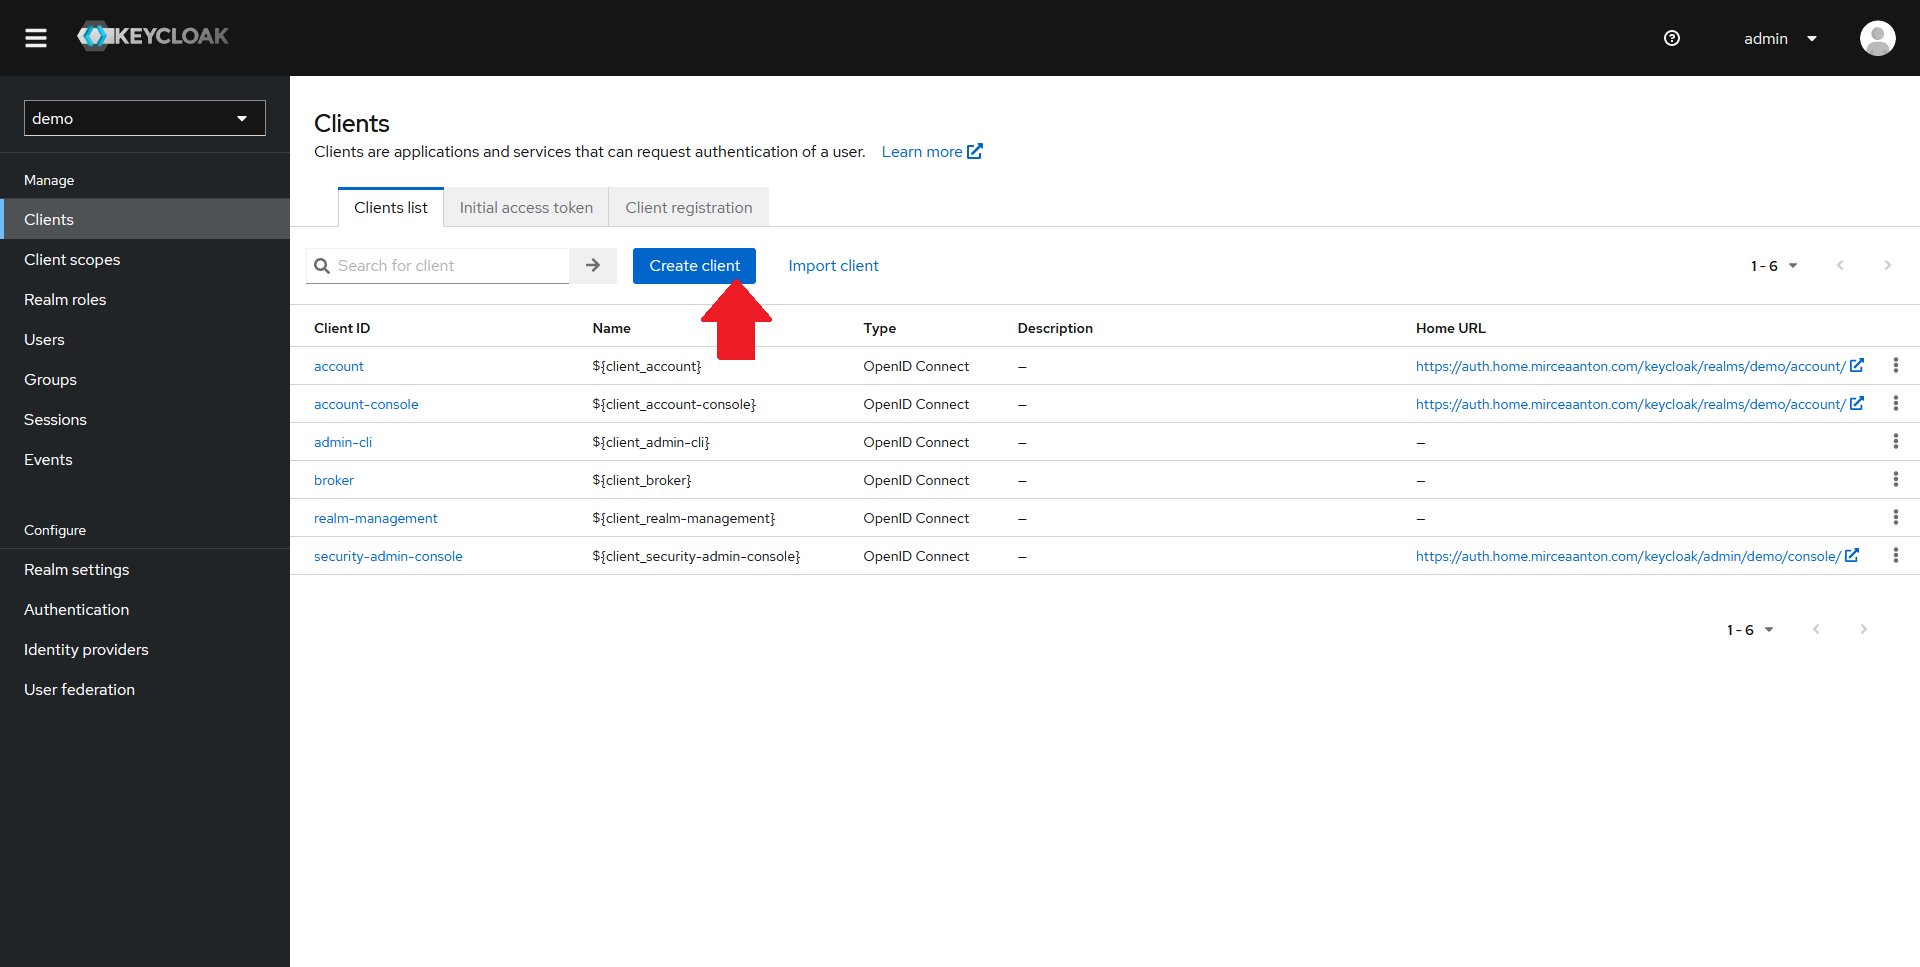
Click on the Create client button at the top of the clients list.
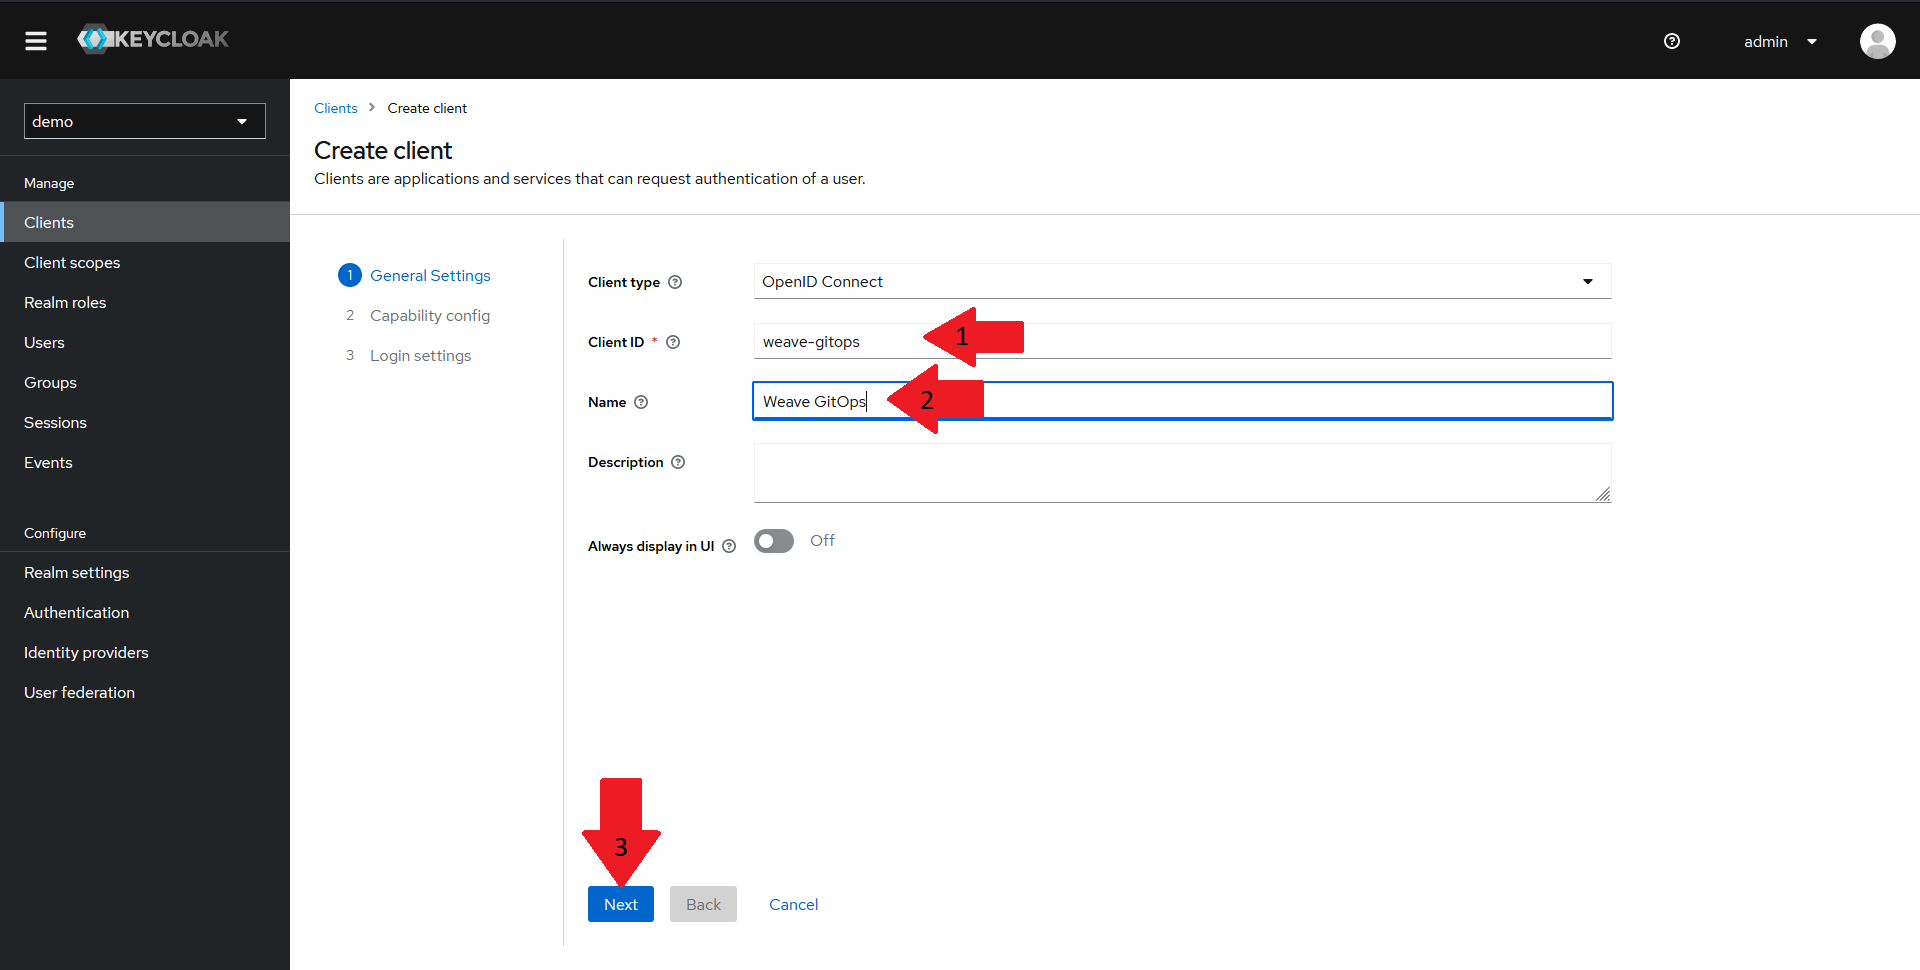
In the General Settings pane:
- Make sure that the client type is set to
OpenID Connect - Set the
clientIDfor your client toweave-gitops - Give your client a suggestive name
- Click on the
Nextbutton.
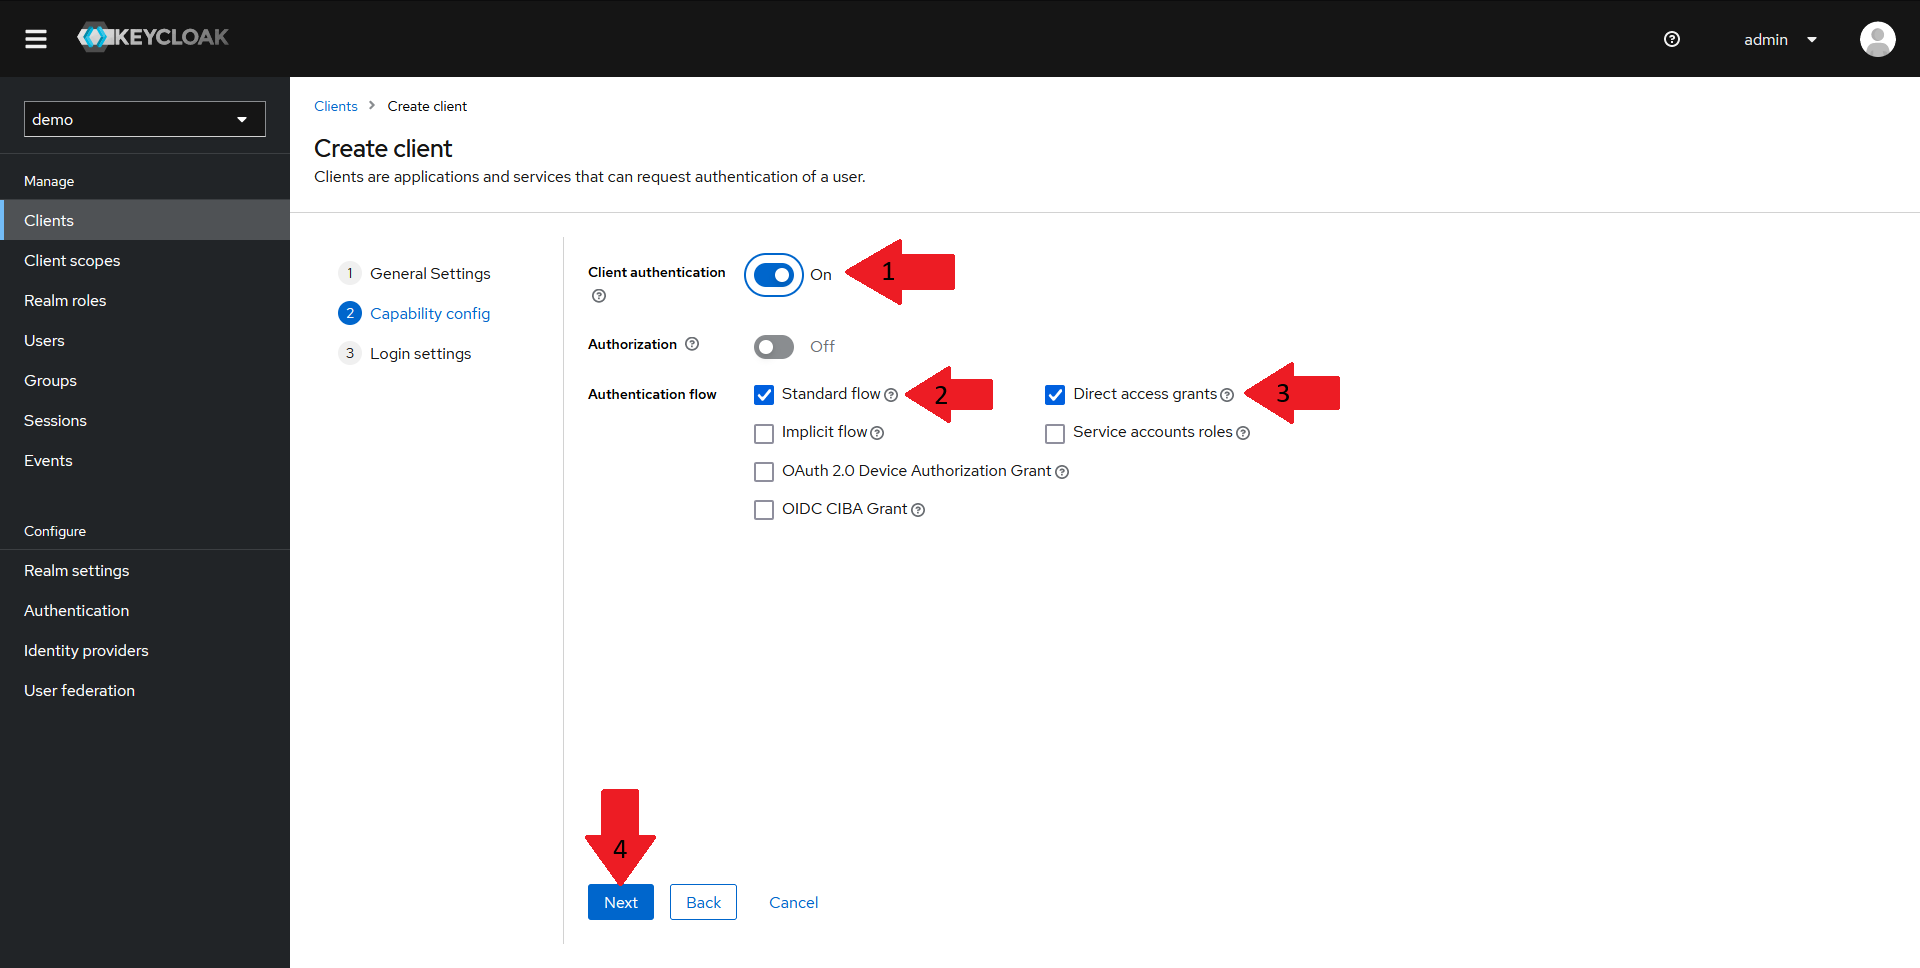
In the Capability config pane:
- Make sure
Client authenticationis turned on - Make sure
Standard flowis turned on - Make sure
Direct access grantsis turned on - Click on the
Nextbutton.

Finally, in the Login settings pane:
- Set the
Home URLfor your client to the URL of your Weave GitOps instance. For this demo, that'shttps://WEAVE_GITOPS_URL - Set the
Valid redirect URIsto the URL of your Weave GitOps instance followed by/oauth2/callback. For this demo, that'shttps://WEAVE_GITOPS_URL/oauth2/callback - Click on
Save
Creating the Groups Mapper for the Keycloak Client
You should now have an OIDC client created in your realm.
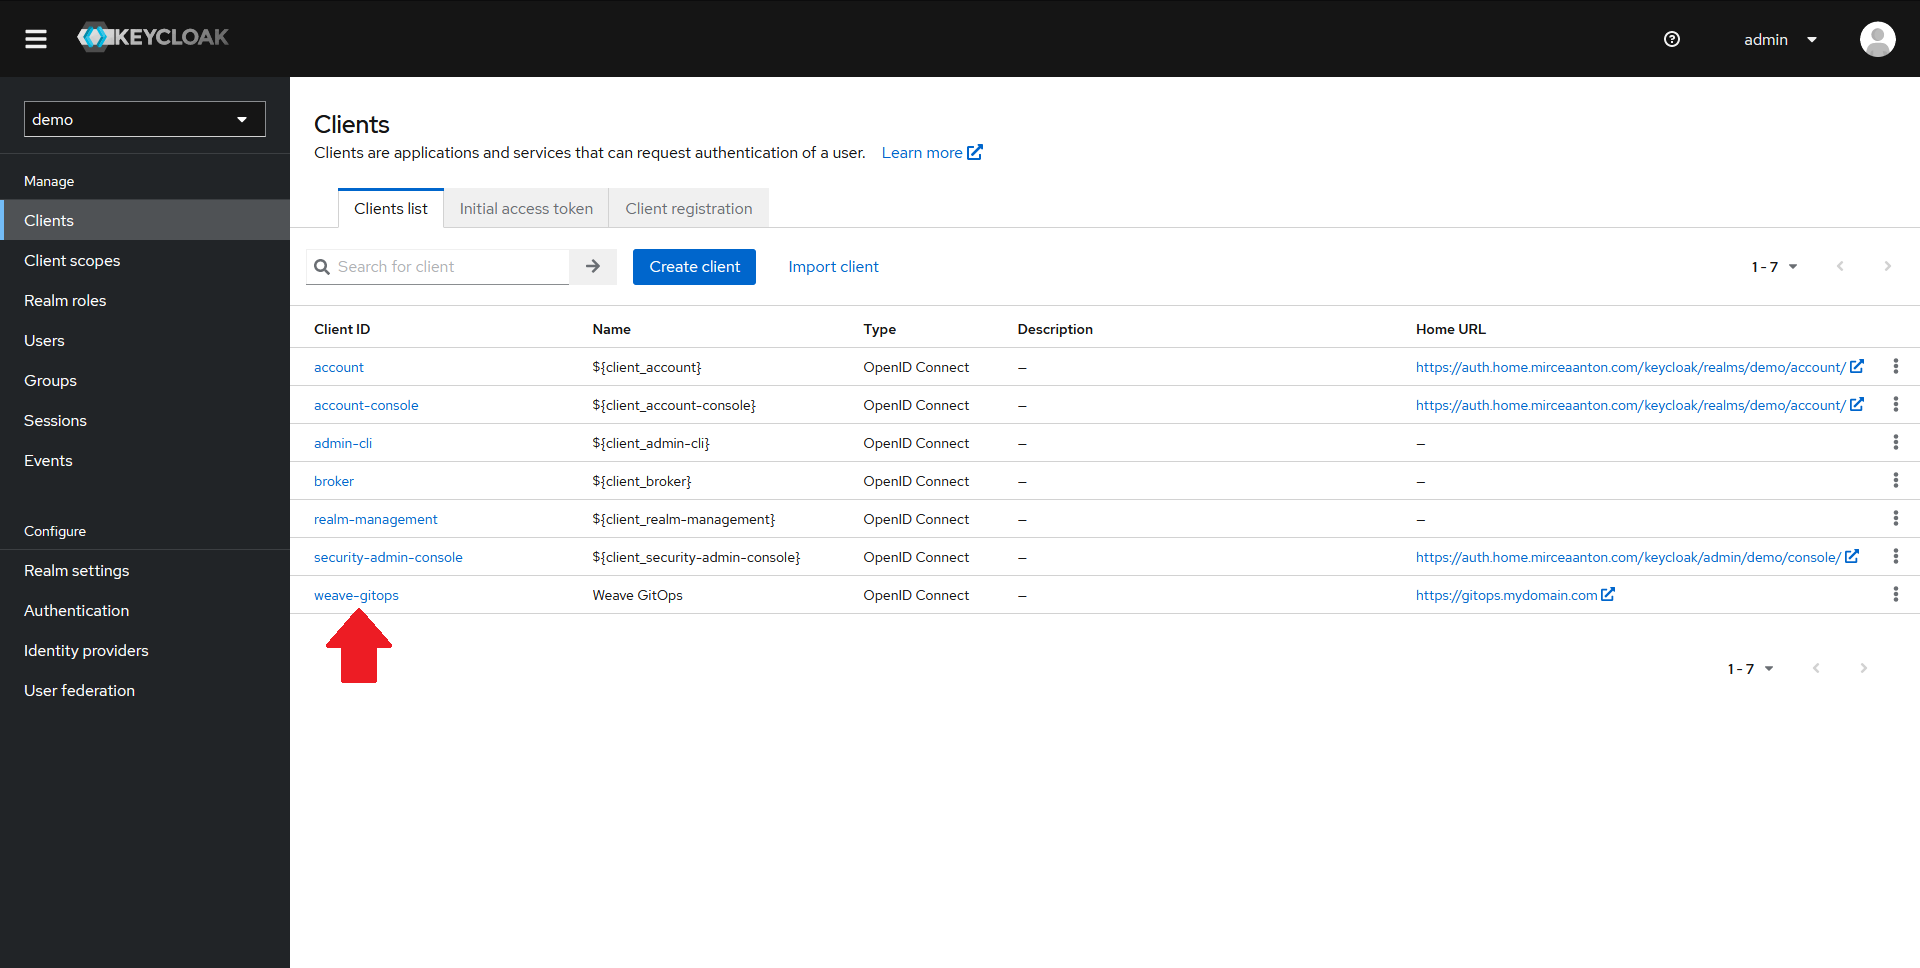
From the Clients page, click on your newly created client.
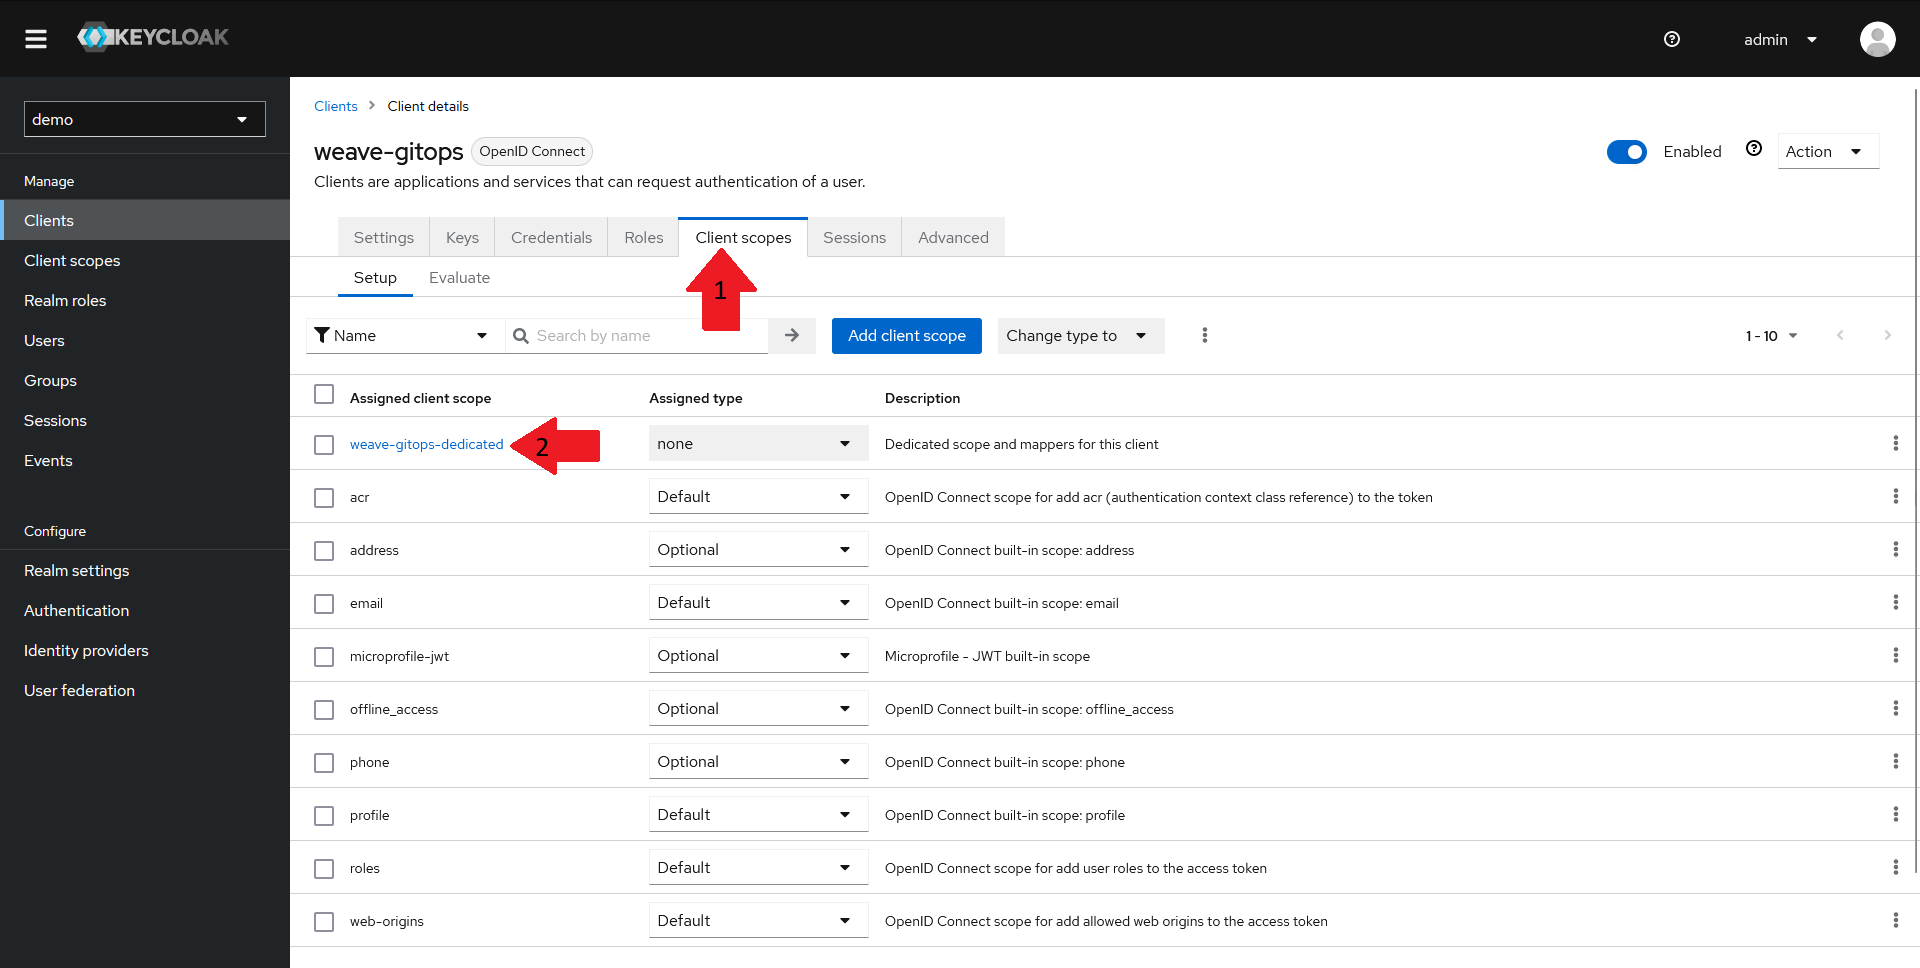
- In the top menu, select the
Client scopestab - From the list of client scopes, select the
<client-name>-dedicatedscope. For this demo, that'sweave-gitops-dedicated
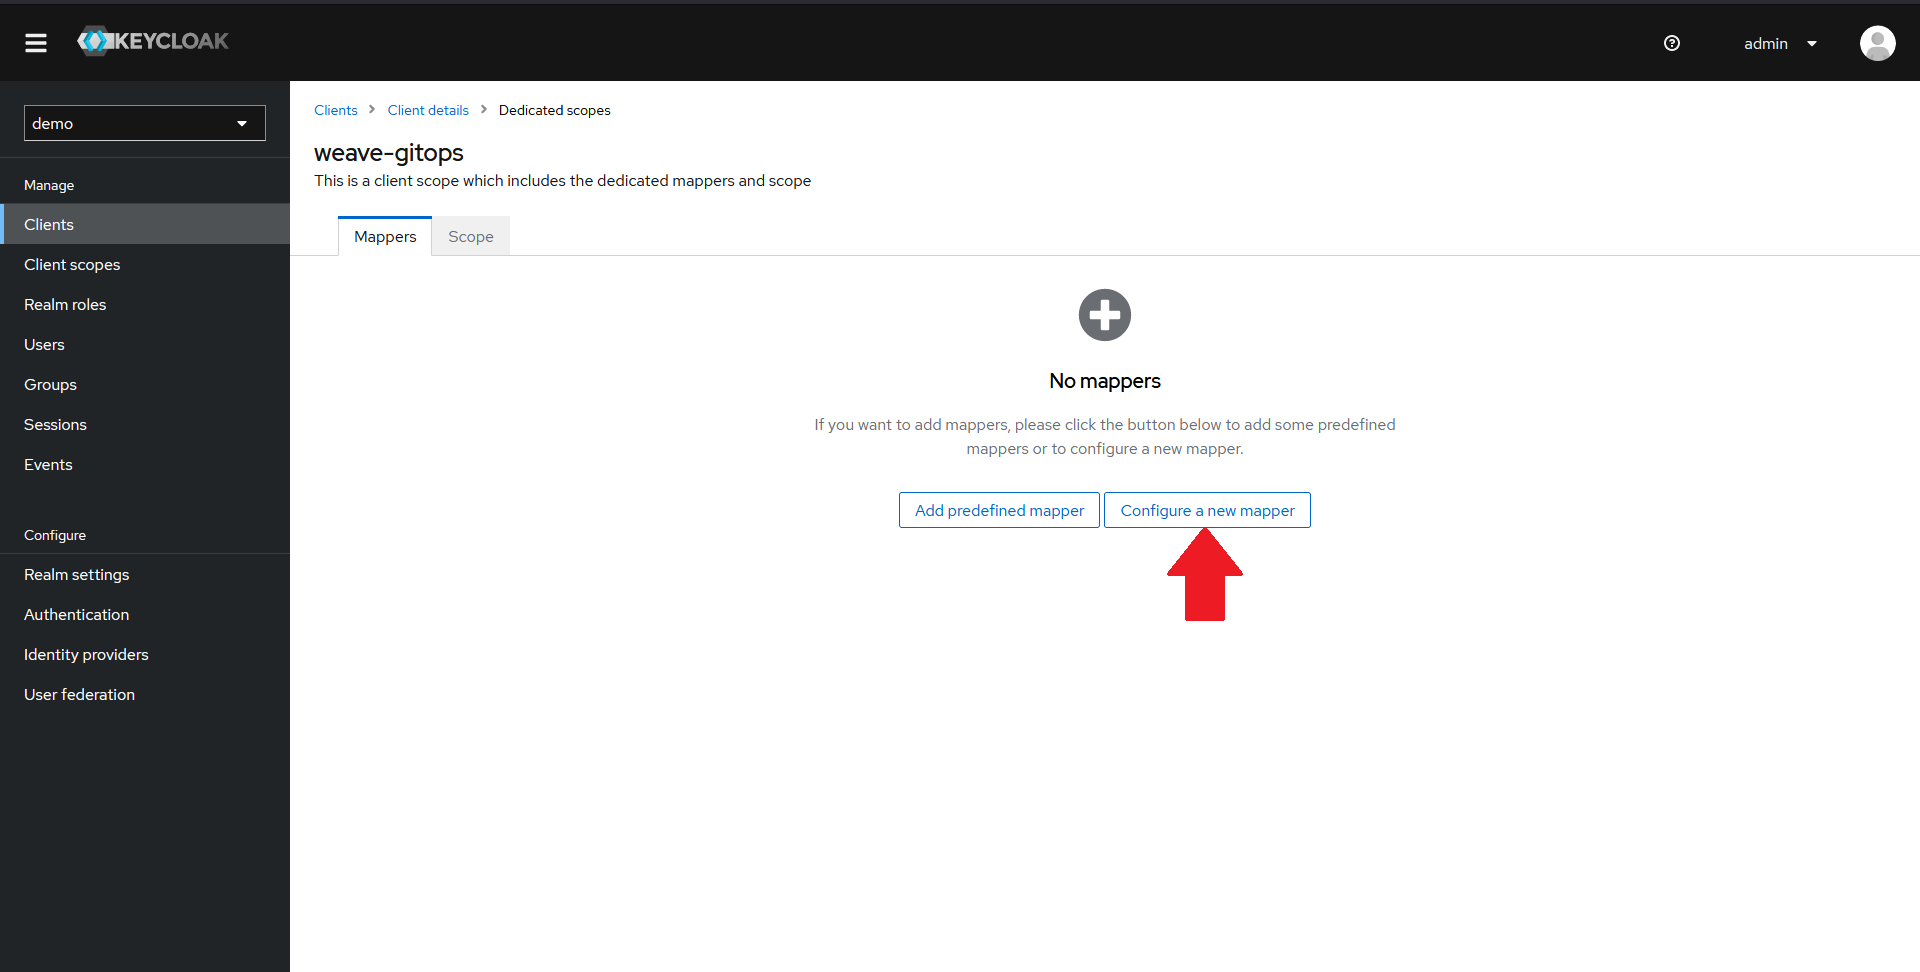
In the new window, you should see that there are no mappers configured. Click on the Configure a new mapper button.
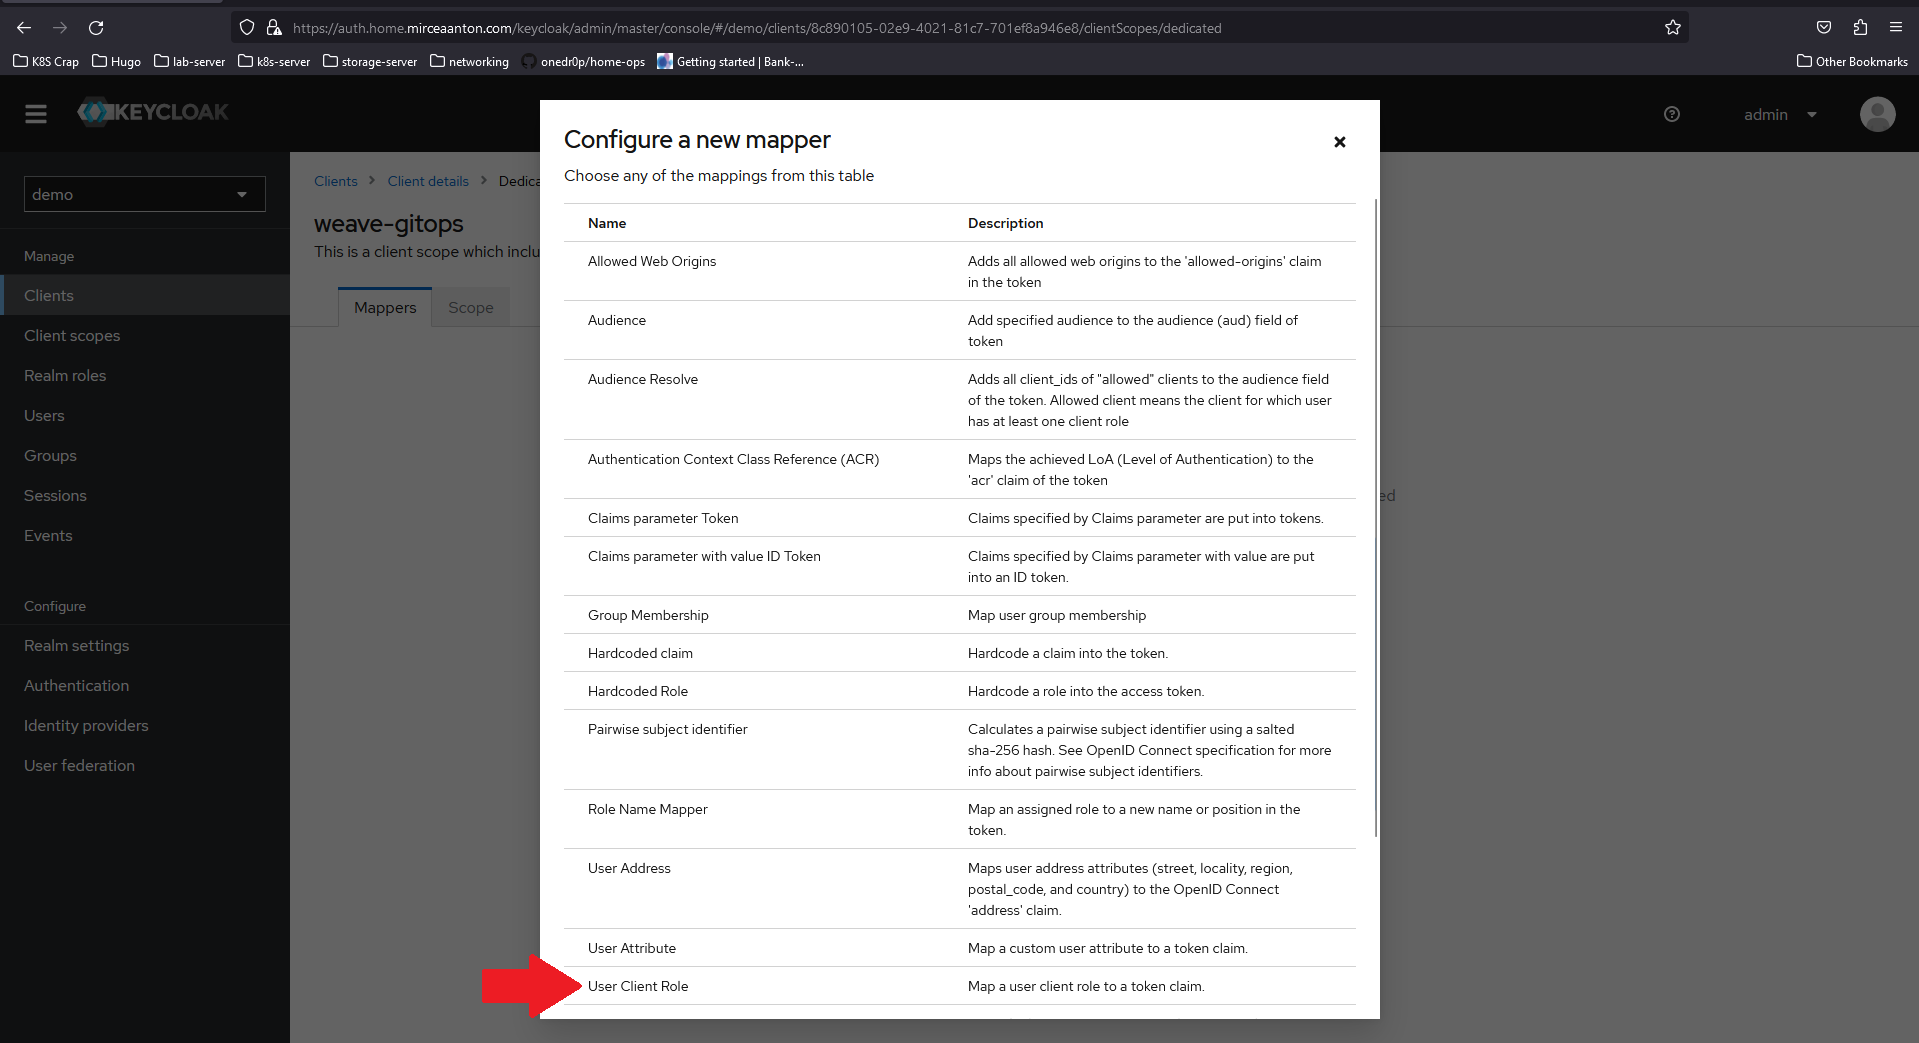
In the dialog that pops up, scroll down until you see User Client Role and select it.
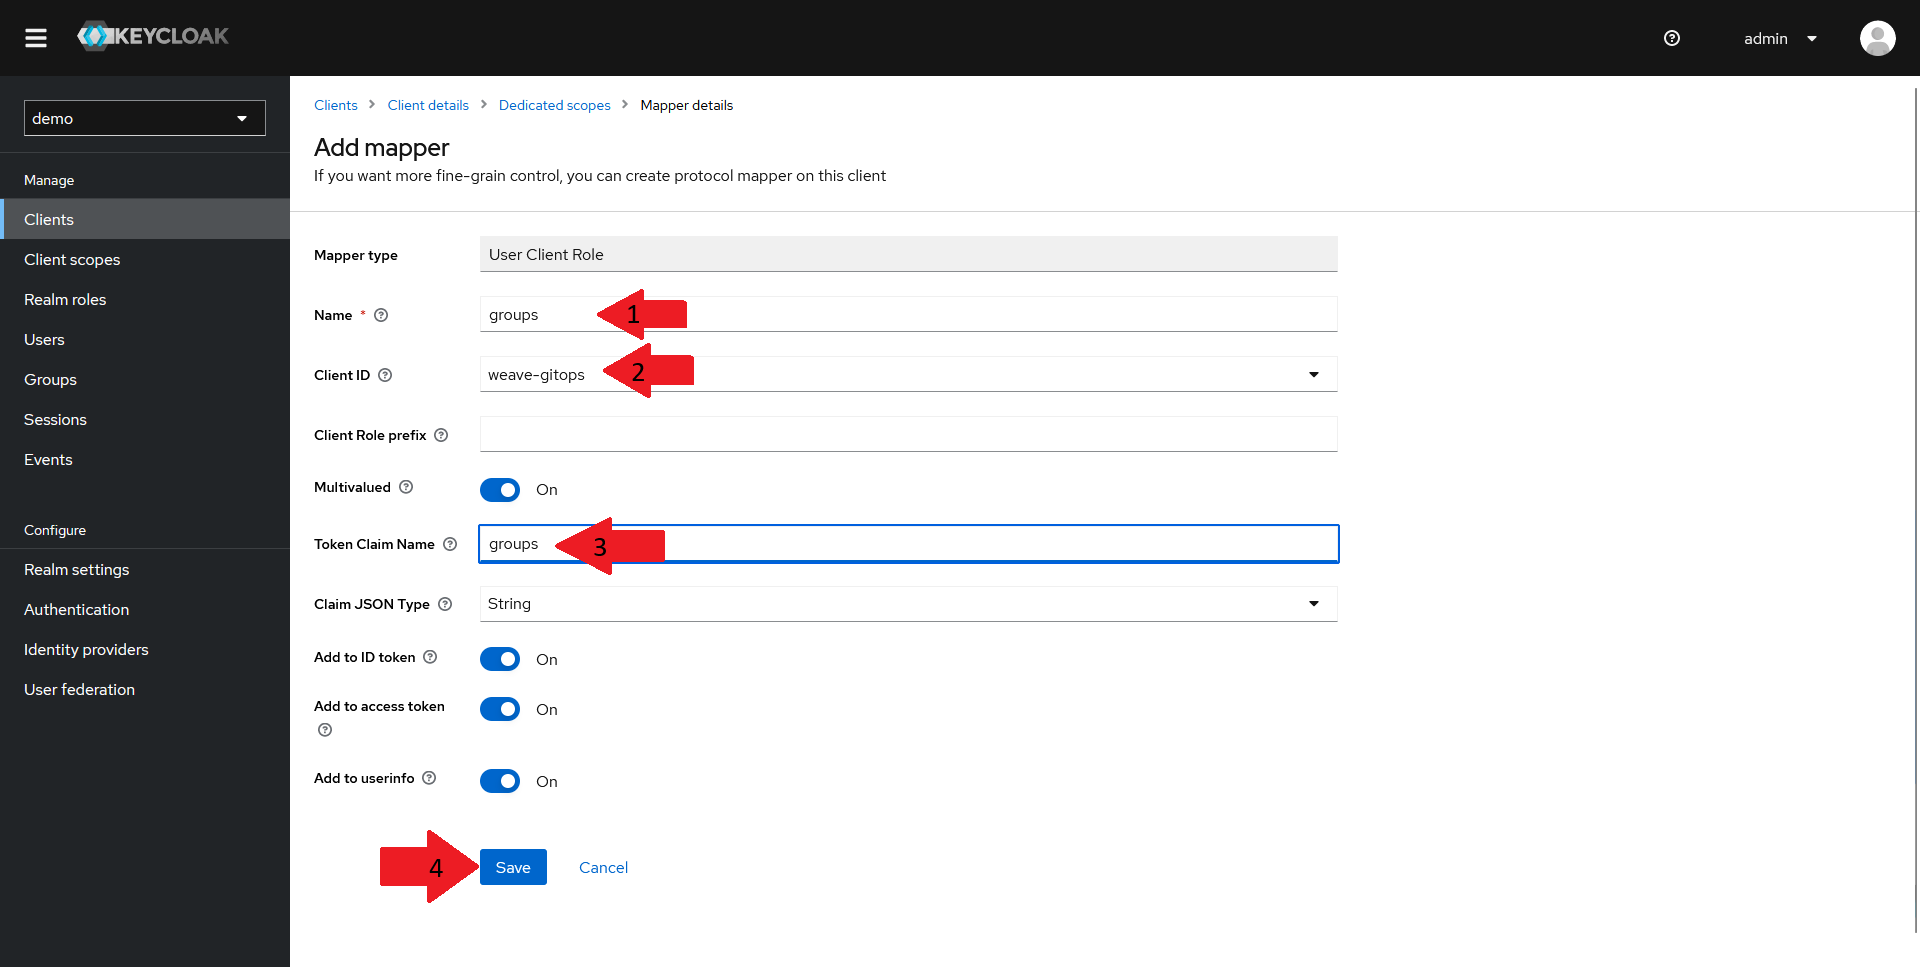
In the new window that opens up:
- Set the
Nameof your mapper togroups - Select your client in the
Client IDdrop-down - Set the
Token Claim Nameto groups - Make sure the other settings match the ones in the screenshot above and click on
Save
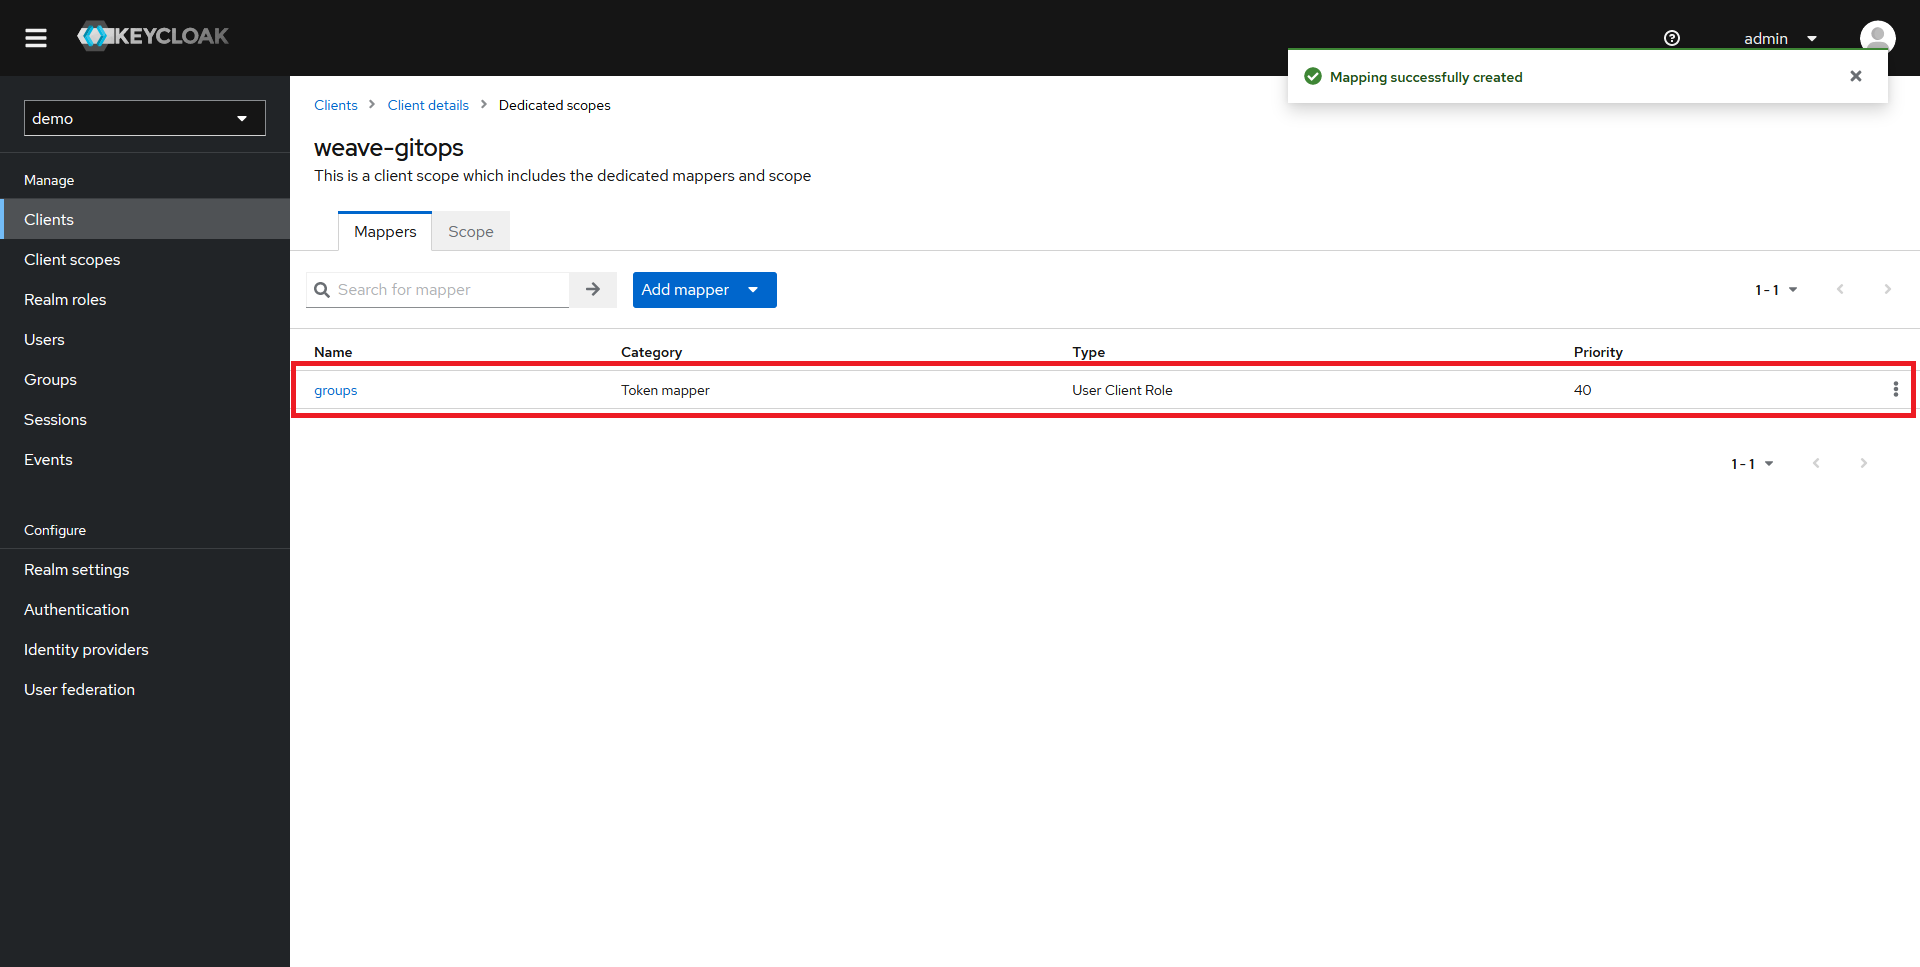
You should now be able to see your new mapper in the list.
Creating the Client Roles
Once your client and your mapper are created, it's time to create some roles.
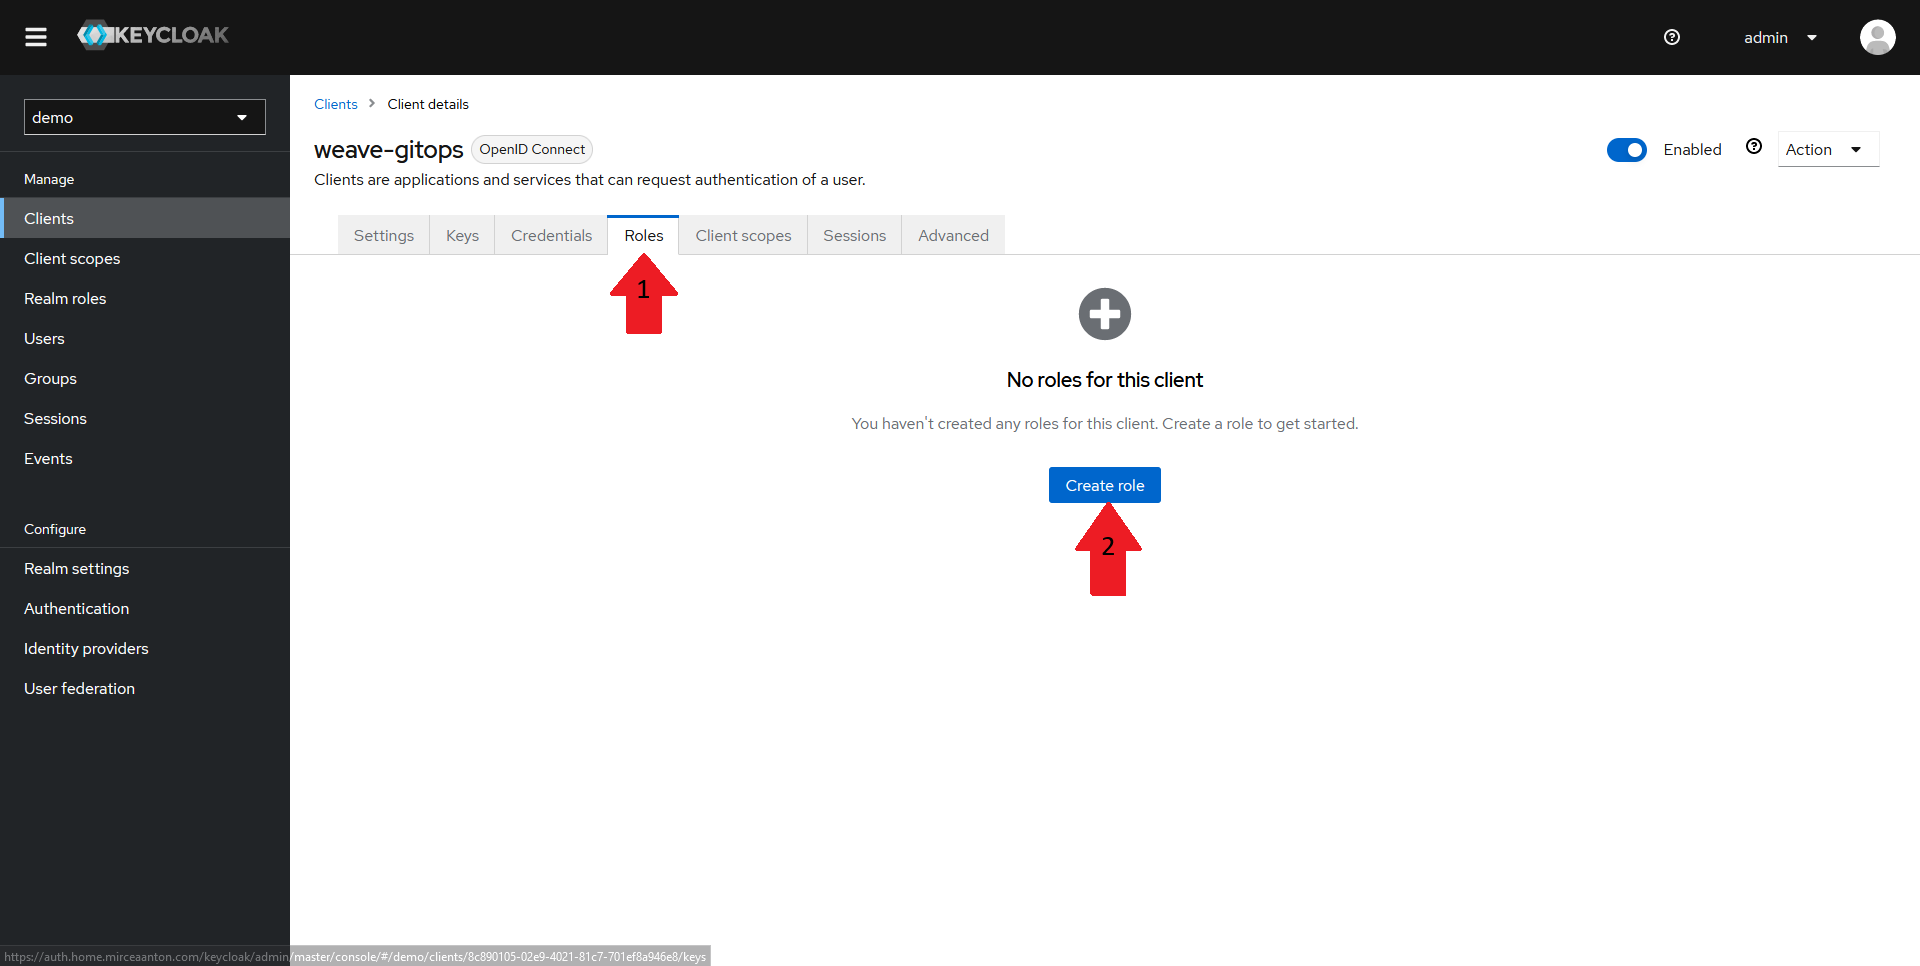
Navigate back to your client page and select the Roles tab in the top menu. It should say that there are currently no roles configured for this client. Click on Create role
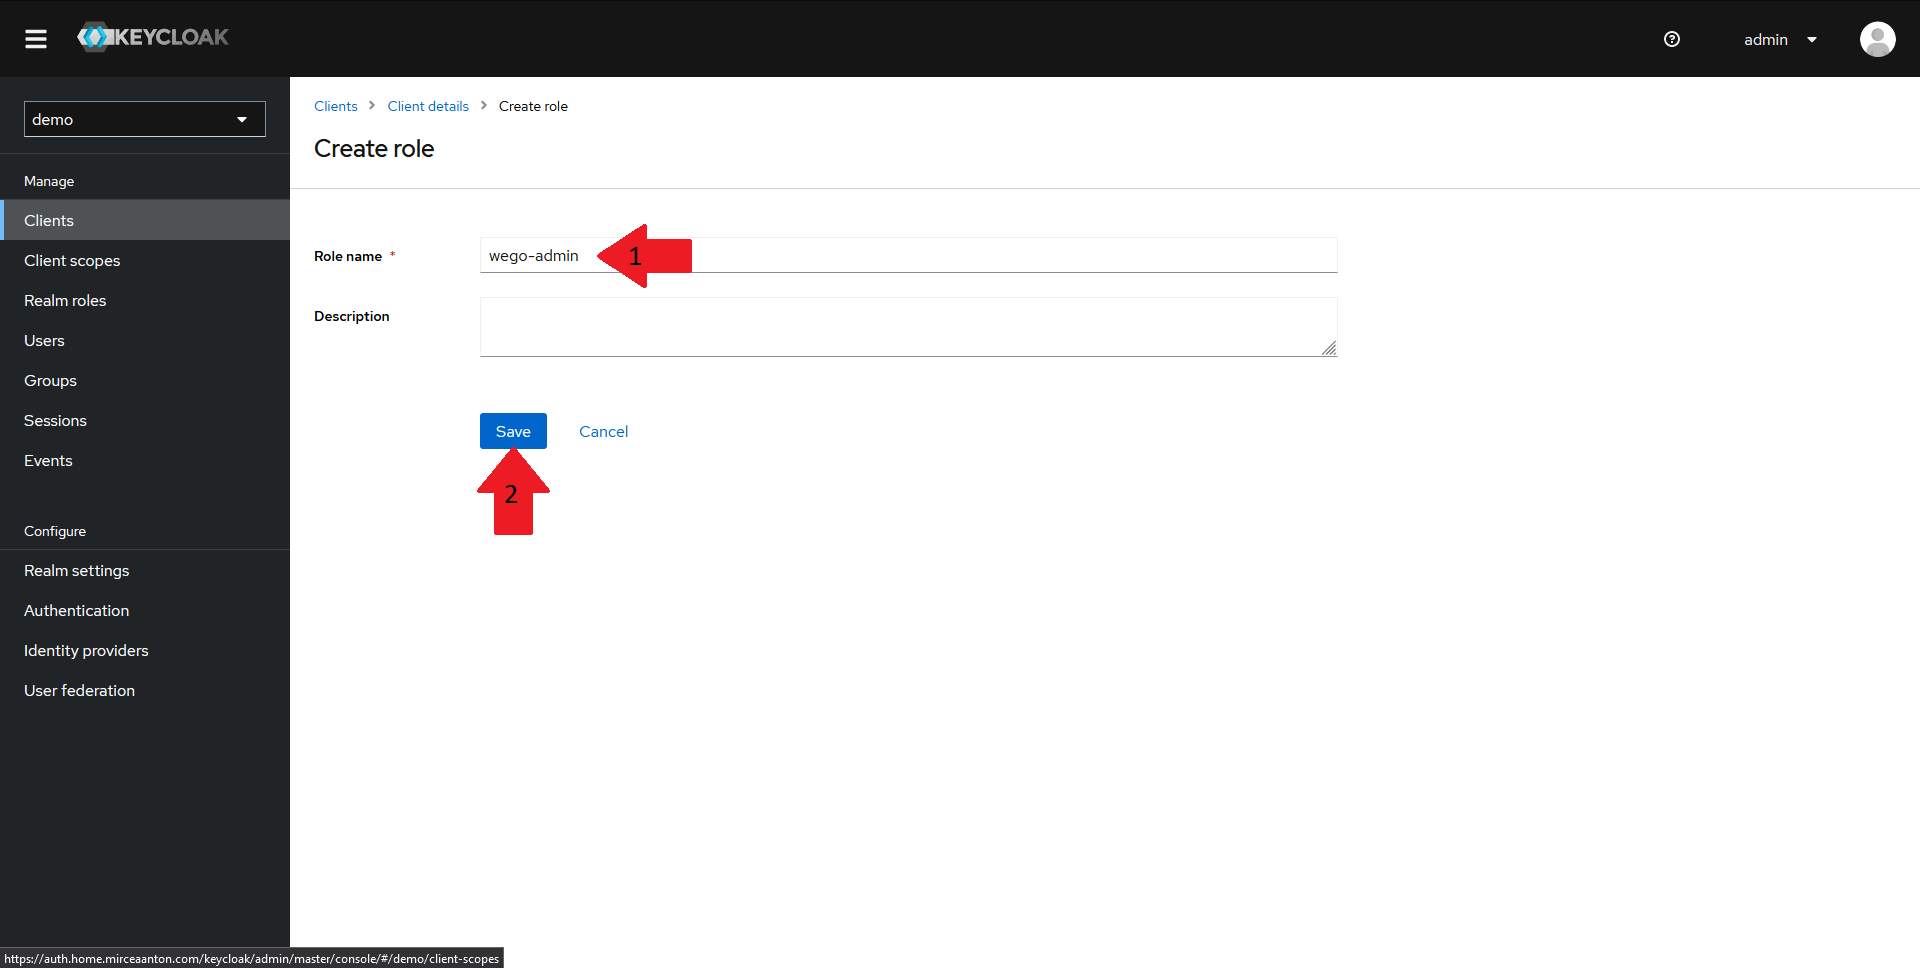
In the new window that is opened:
- Fill in your role name to
wego-admin - Click on
Save
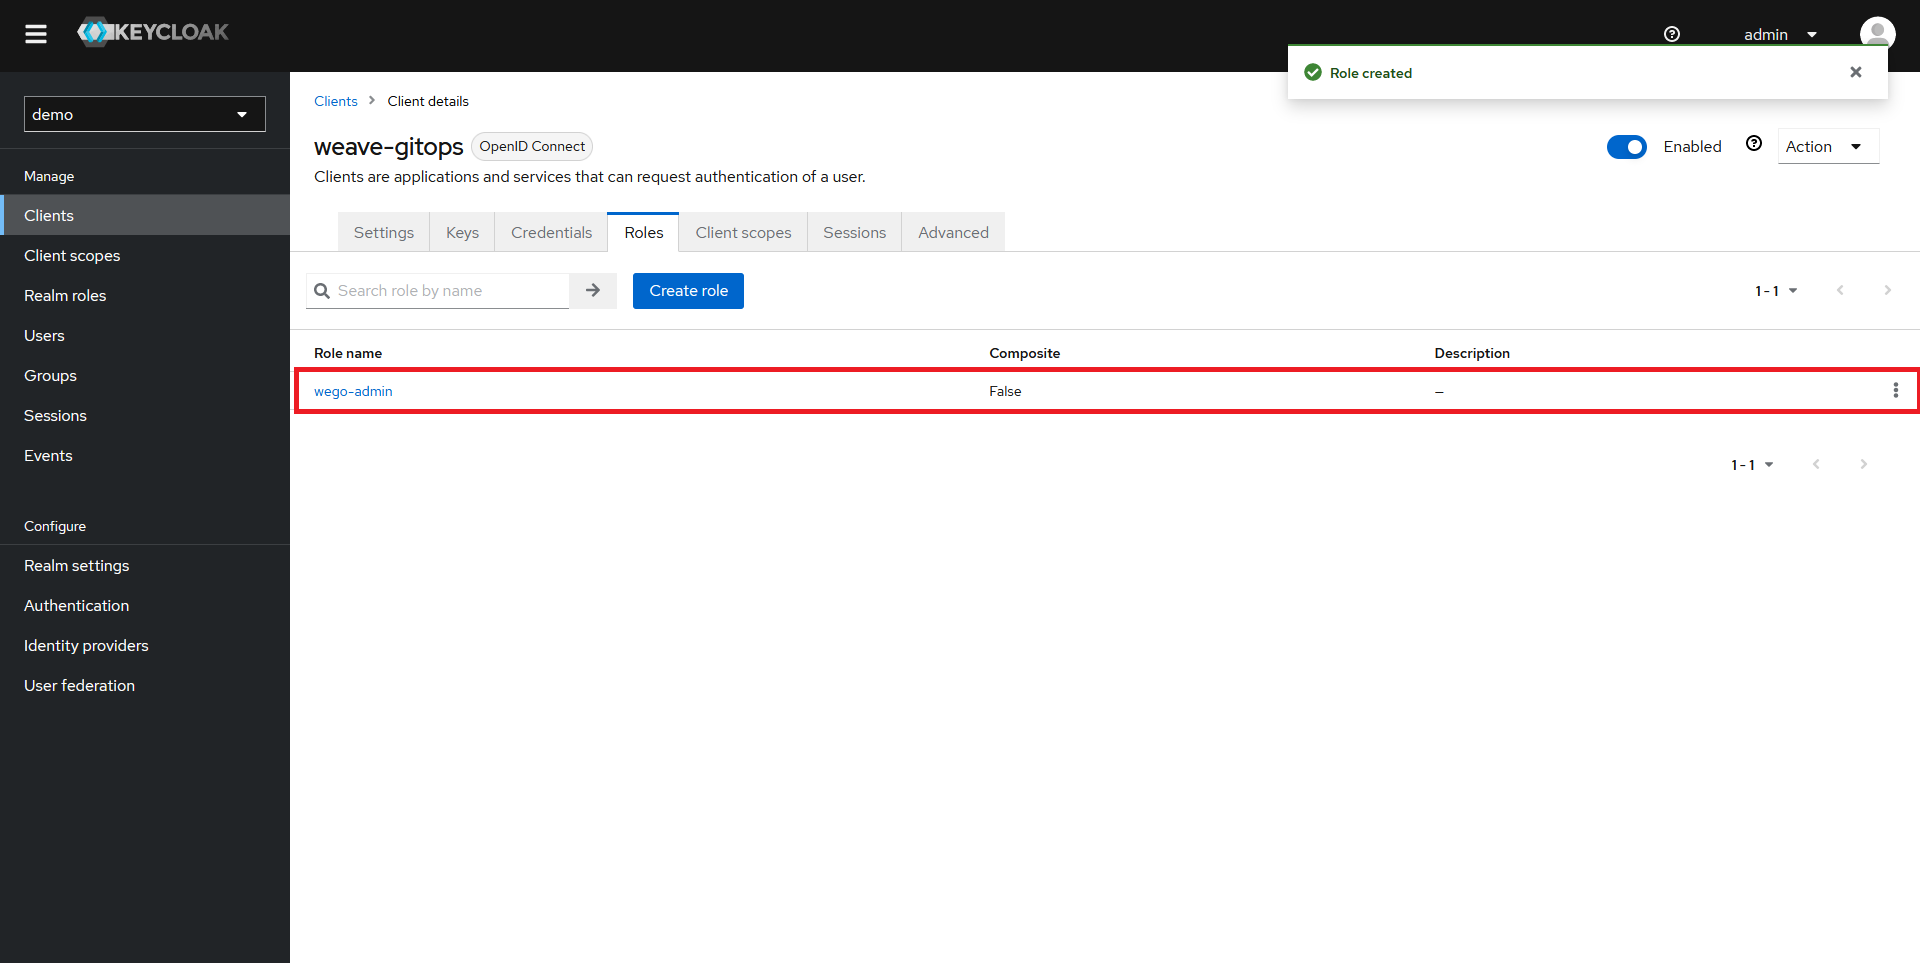
You should now be able to see your new role configured.
Obtaining the client secret
Now that everything is configured, we need to grab the client secret from Keycloak in order to configure OIDC for Weave GitOps.

Navigate back to your client page and select the Credentials tab in the top menu. Copy the Client secret value and save it for later.
Creating a demo user
Since this demo does not cover setting up the LDAP or AD integration for Keycloak, we need to create a demo user to validate our config.
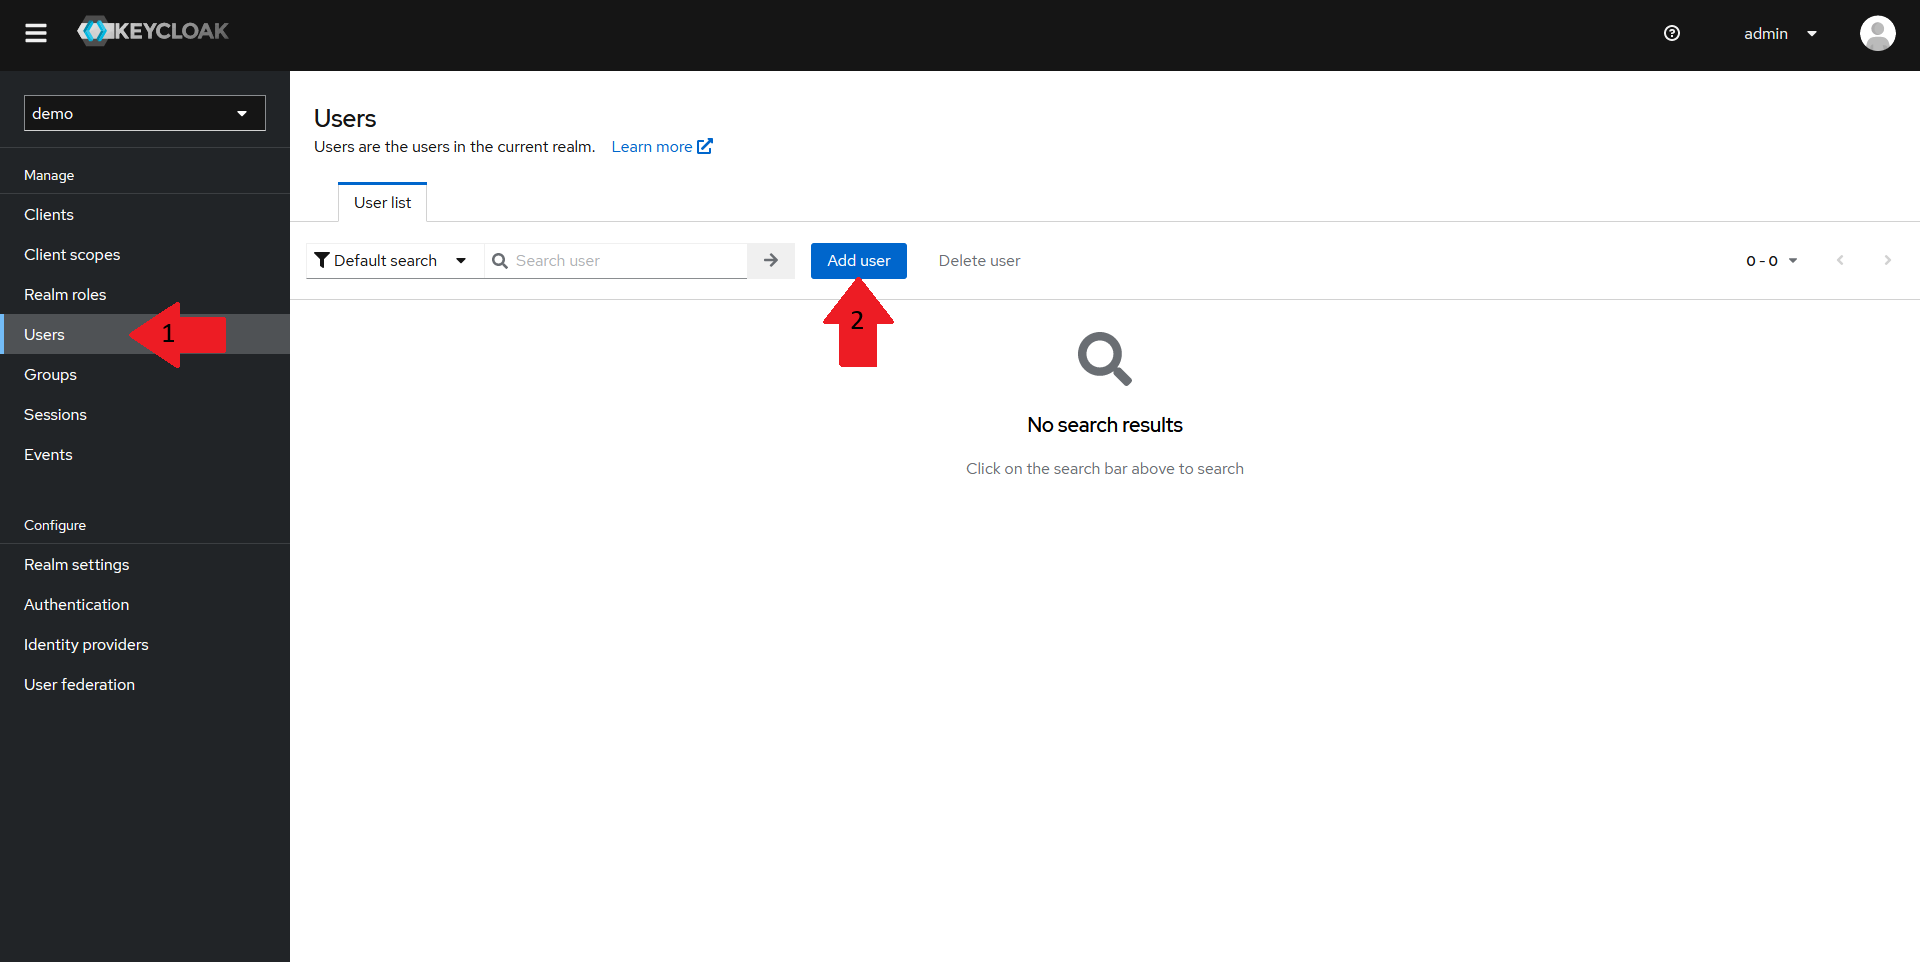
Navigate back to the realm homepage in your Keycloak Admin console, and:
- Select the
Userstab in the left menu - Click on the
Add userbutton
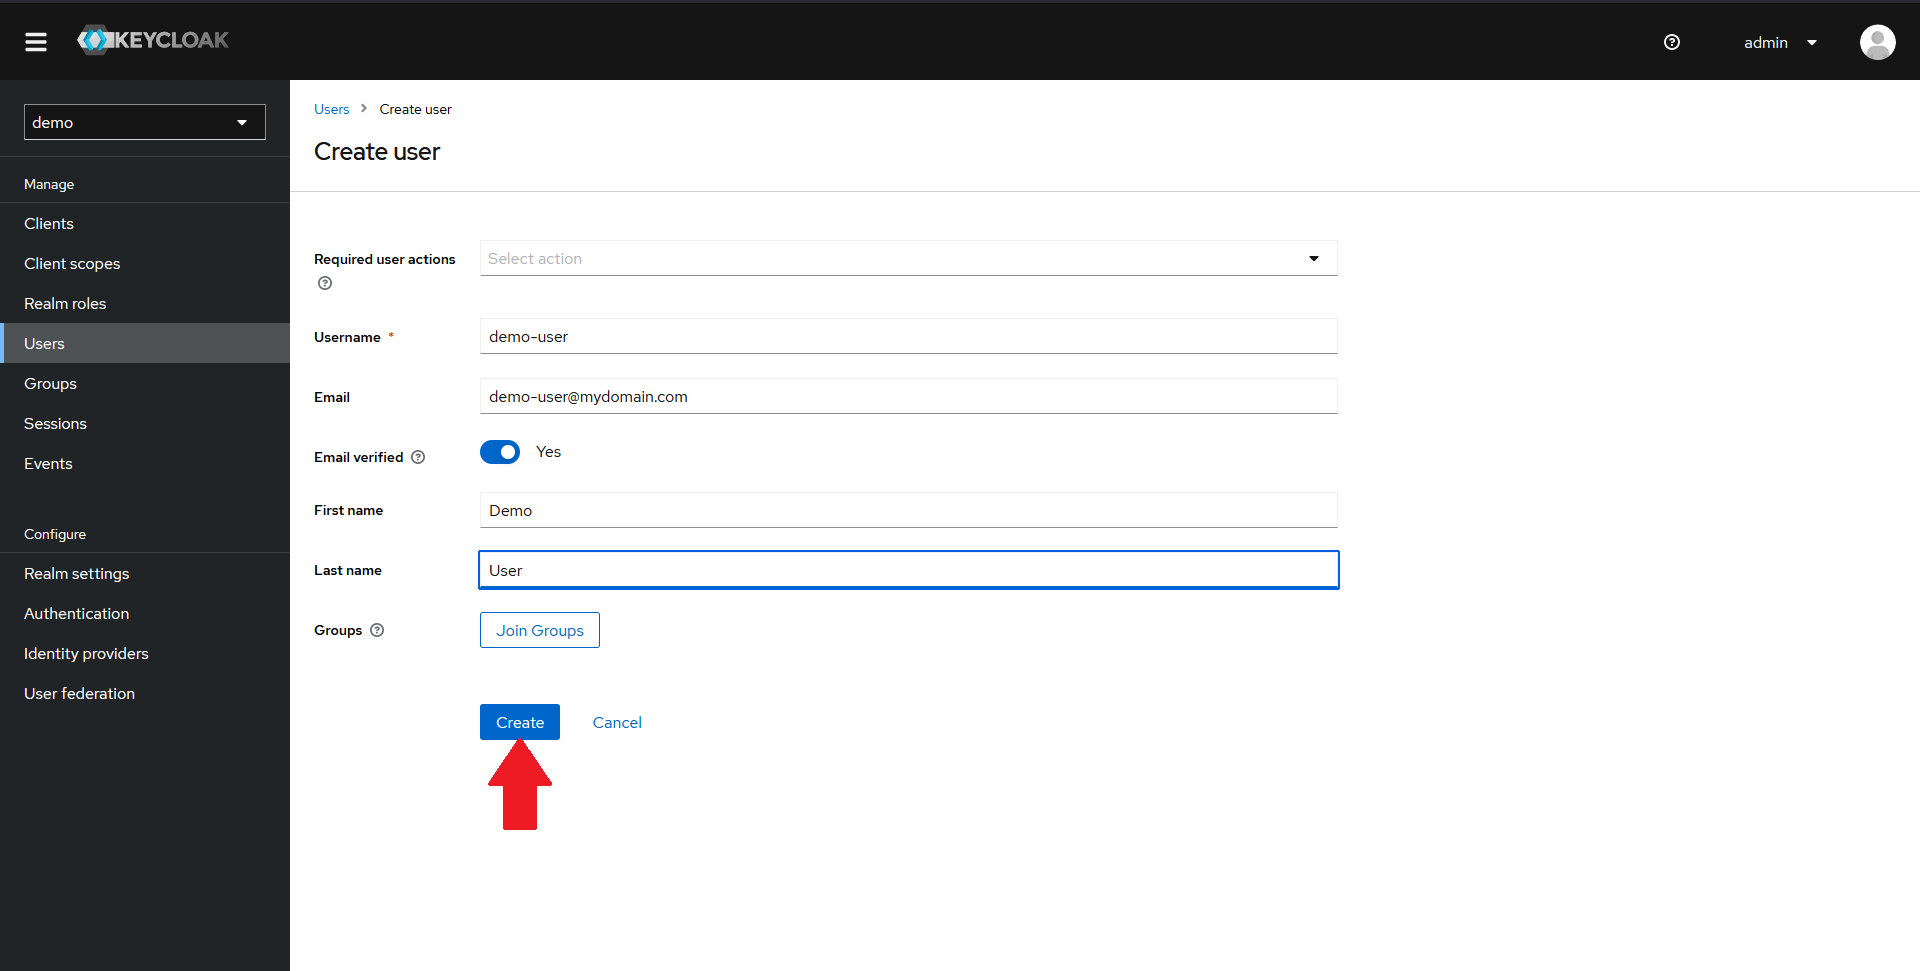
In the new page that opens up, fill in the details of a demo user and click on Create.

Once the user is created, we need to set a password. To do that:
- Navigate to the
Credentialstab in the top menu - Click on the
Set passwordbutton
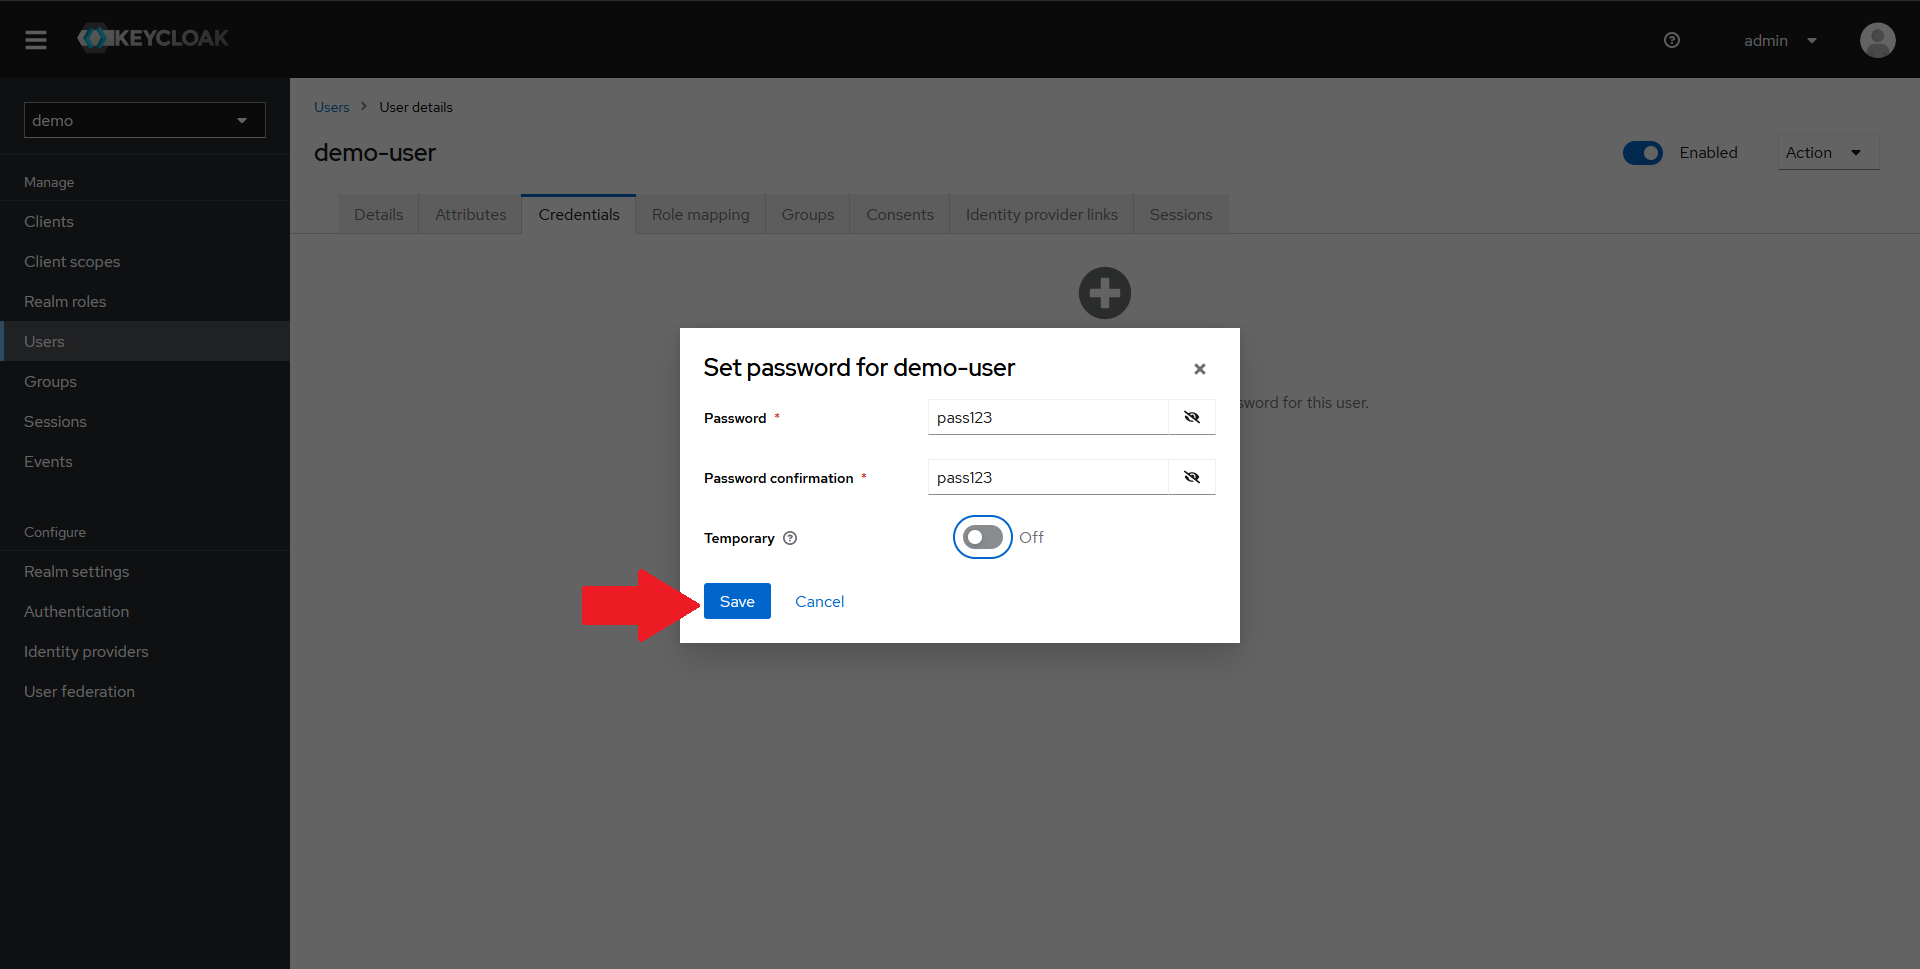
In the dialog that opens up, set a password for your user, confirm it, optionally mark it as not-temporary and click on Save.
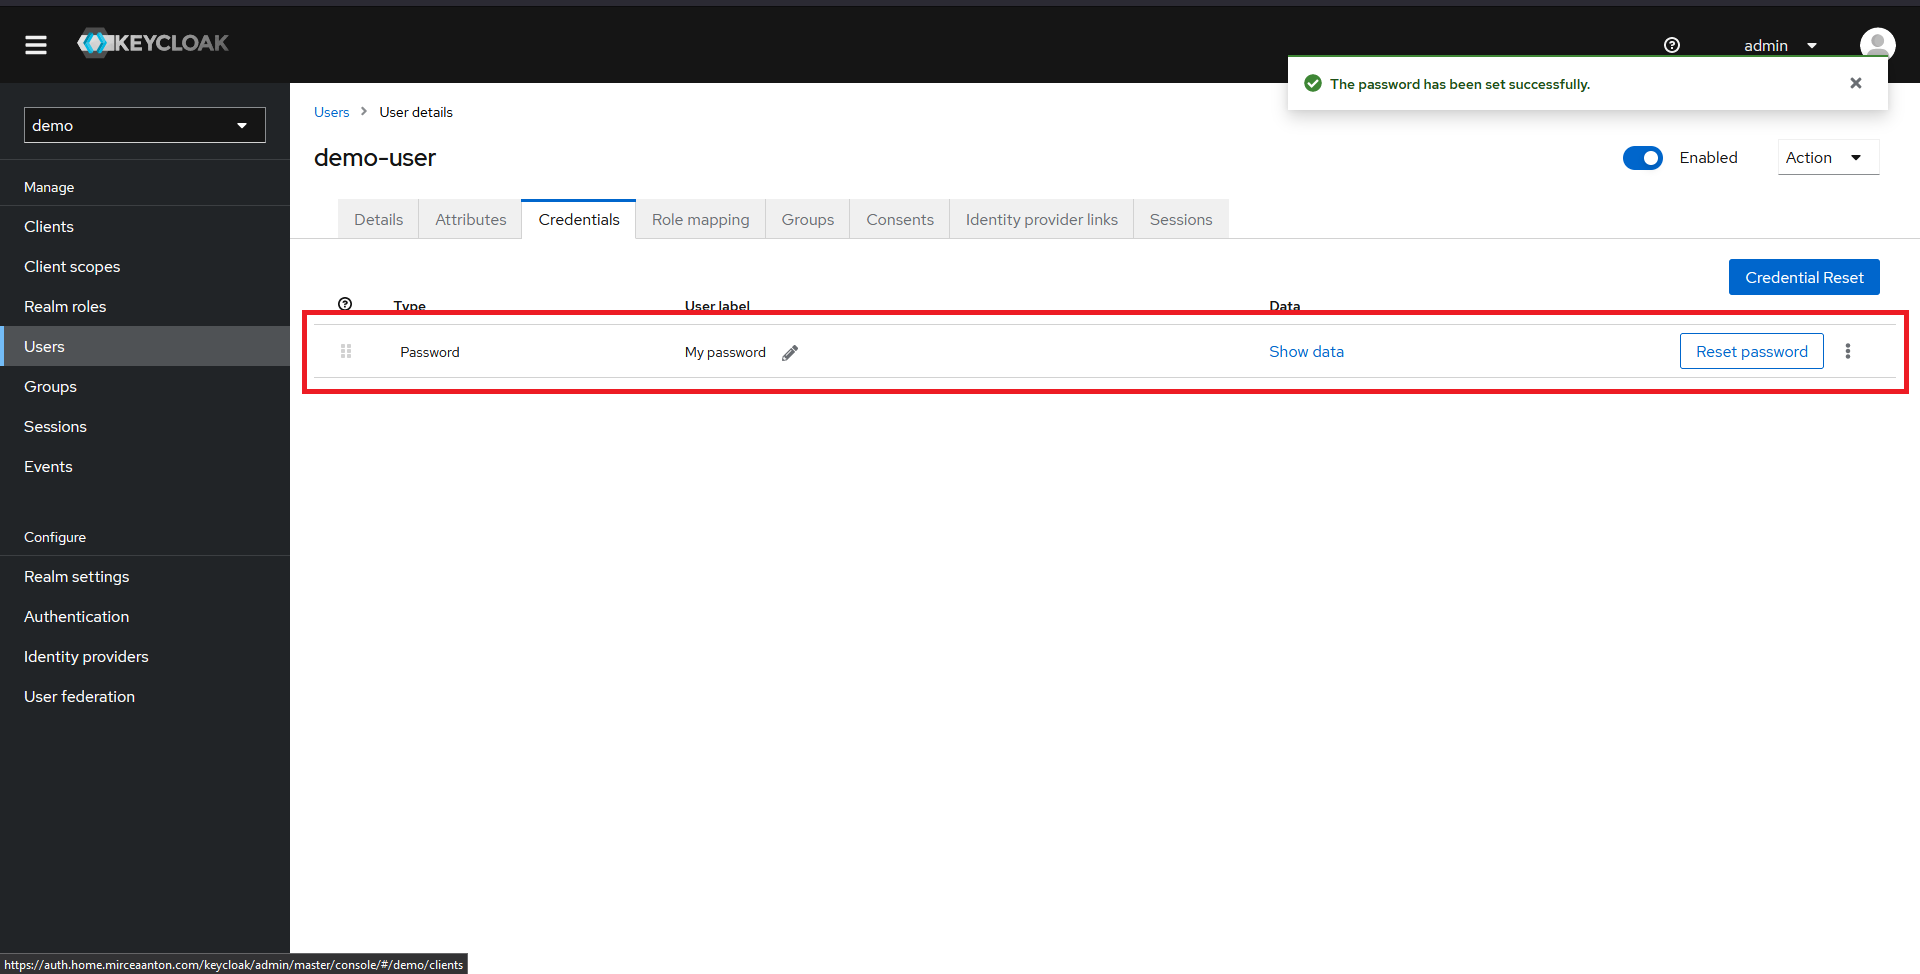
You should now see a password configured for your user.
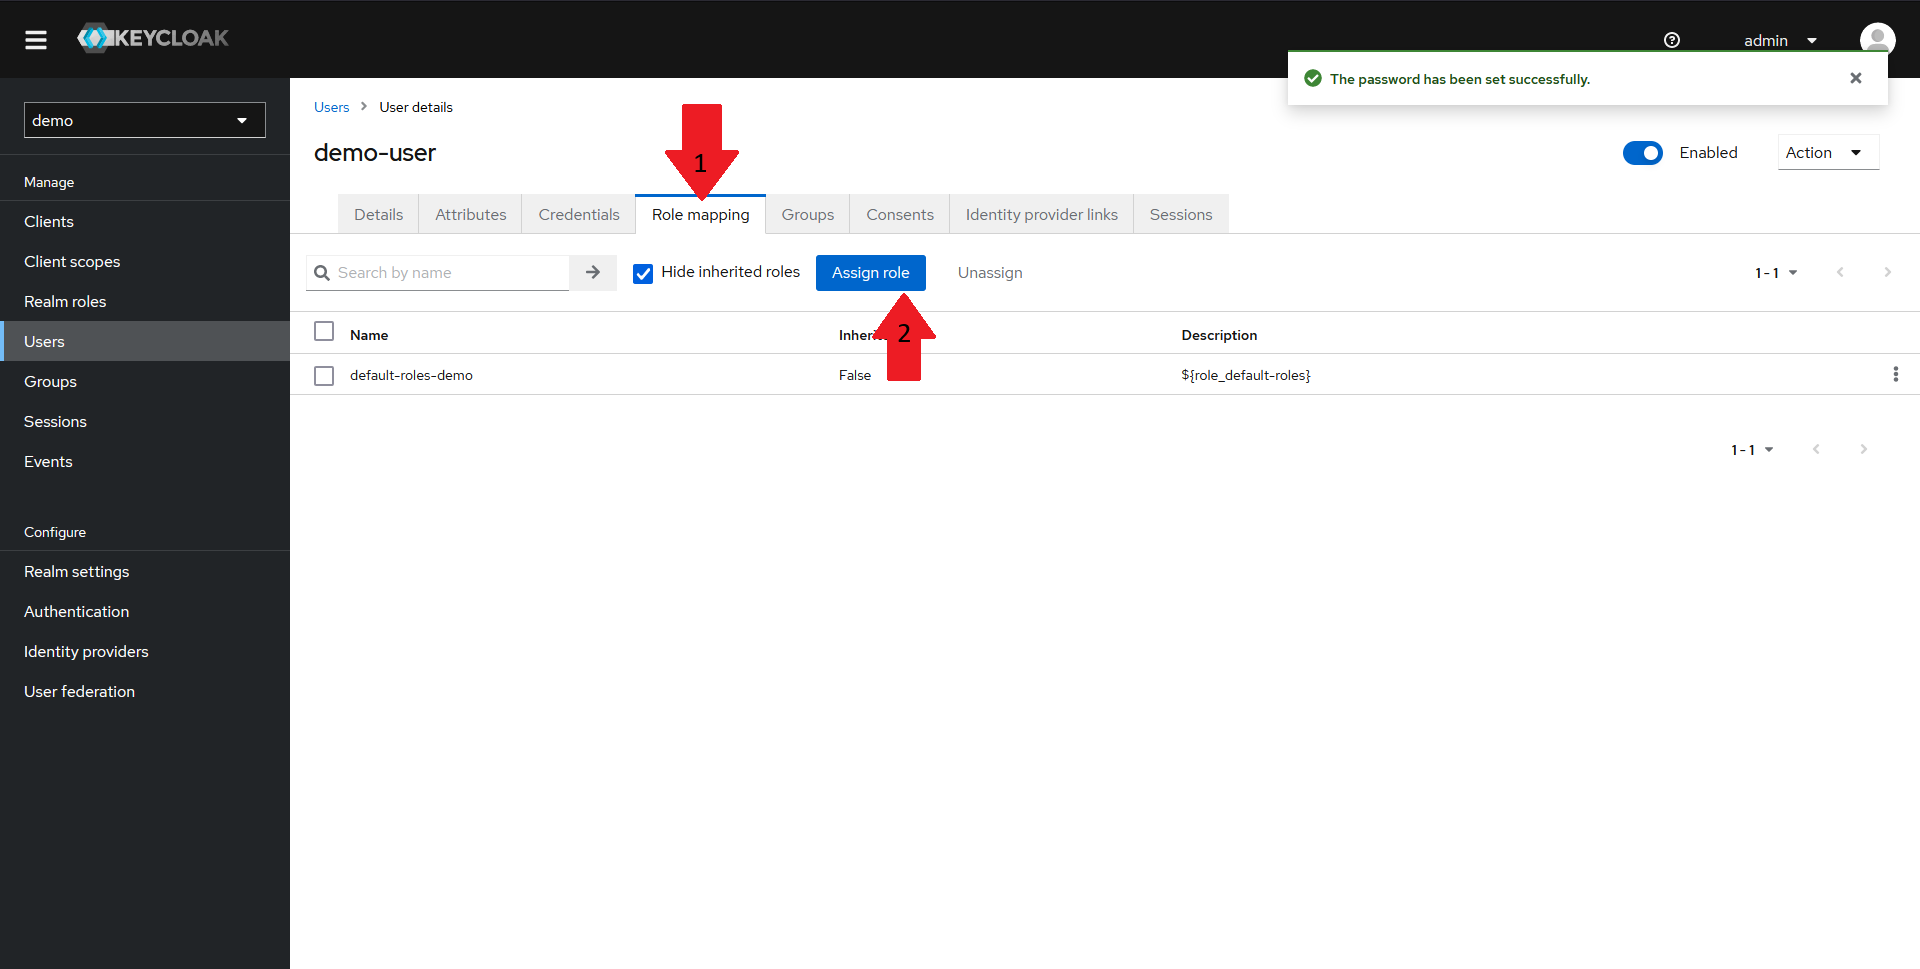
Now we need to assign the wego-admin role we created earlier to our user. To do that:
- Navigate to the
Role mappingtab in the top menu - Click on the
Assign rolebutton
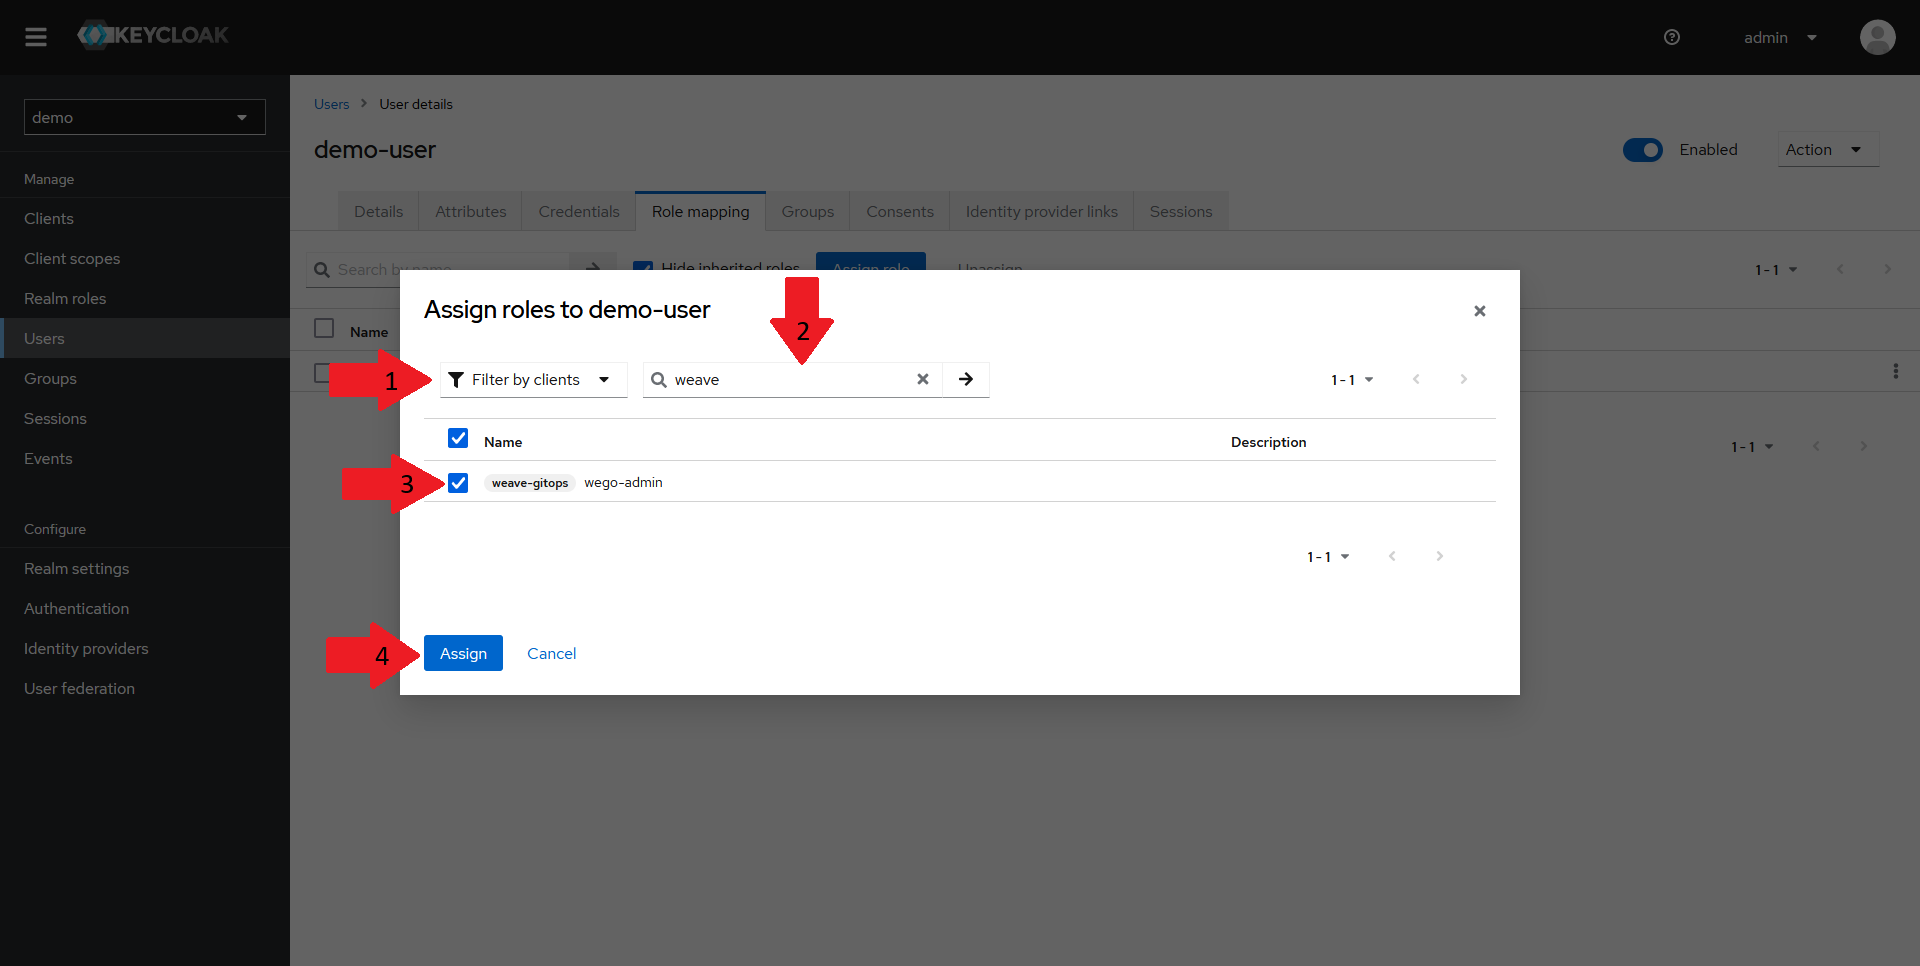
In the dialog that opens up:
- Select the
Filter by clientsoption in the dropdown - Type in your client name in the search bar
- Tick the checkbox next to the role
- Click on
Assign
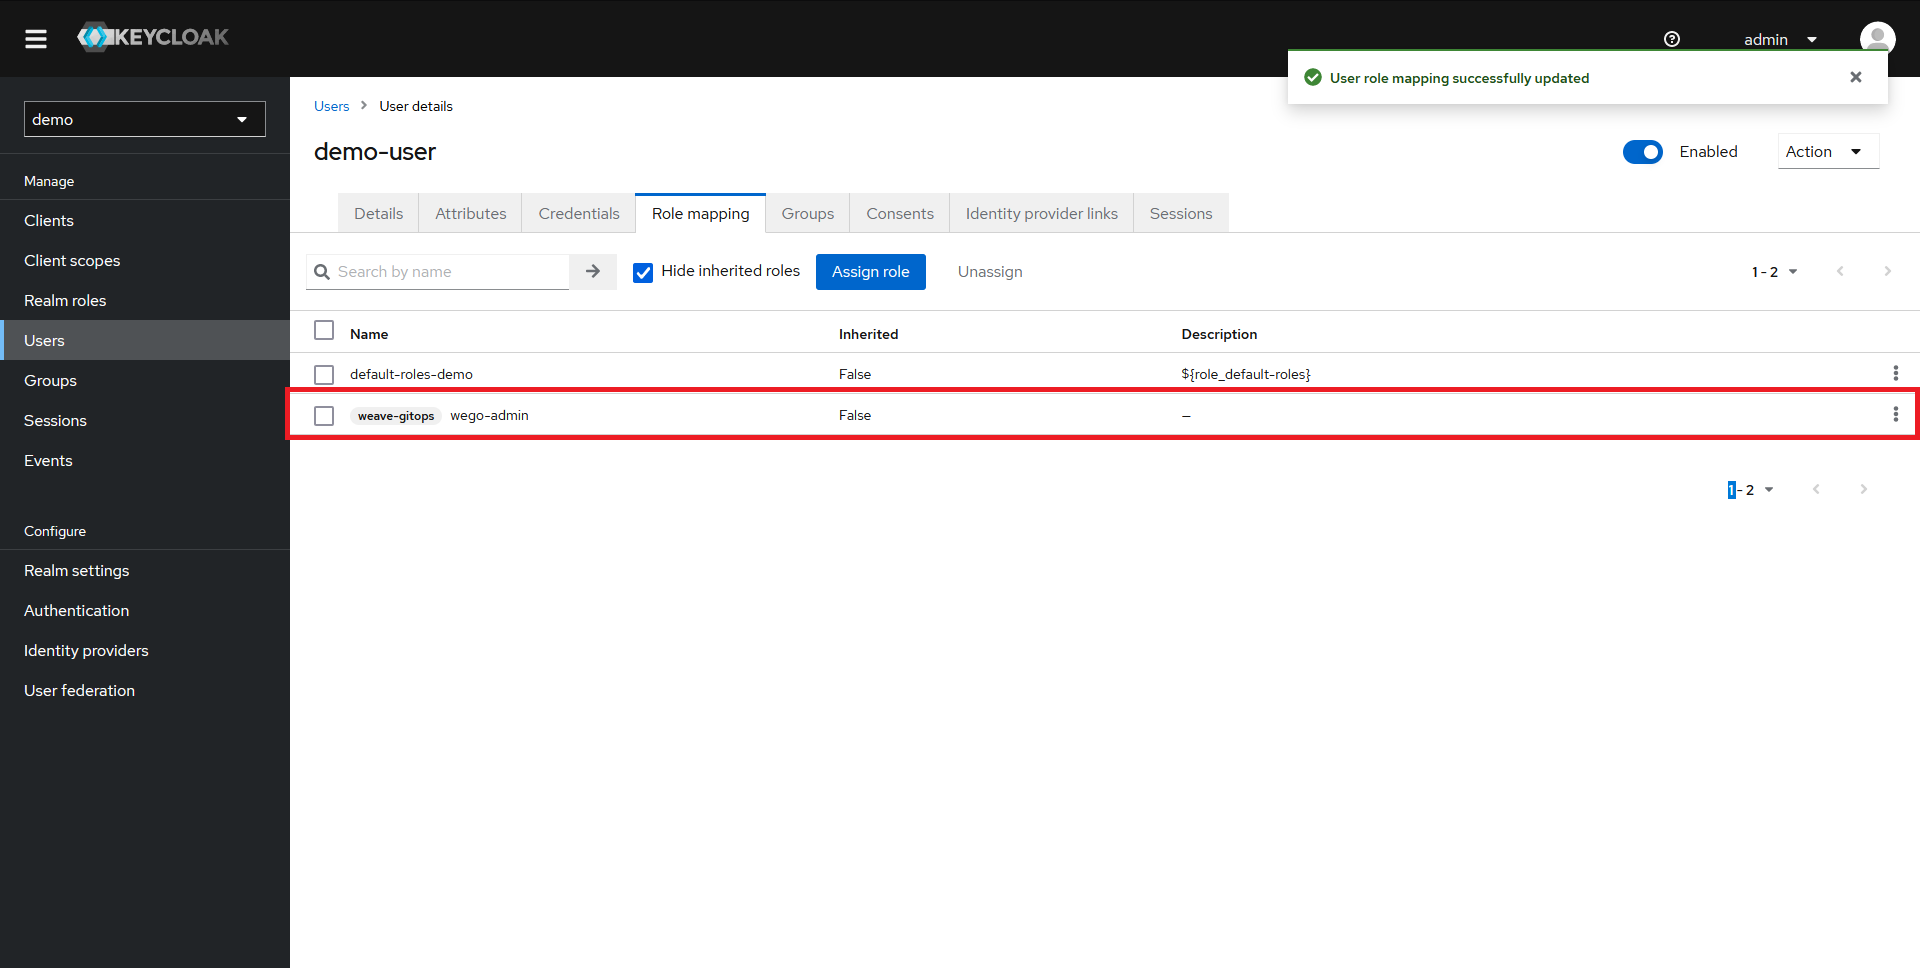
The role should now appear in the Role mapping section and our user should be fully configured.
Configuring Weave GitOps to use our new Keycloak Client
Now that our Keycloak configuration is done, it's time to link our Weave GitOps deployment to it.
Creating the oidc-auth secret
To configure Weave GitOps for OIDC authentication via Keycloak, we need to configure the oidc-auth secret. We need to set:
- the
issuerURLto the URL of our keycloak instance, followed by/realms/<realm_name> - the
redirectURLto the URL of our Weave GitOps instance, followed by/oauth2/callback - the
clientIDto the id of the client we created in the previous steps - the
clientSecretto the secret we copied a few steps ago - the
customScopestoemail - the
claimGroupstogroupsto work with our mapper, mapping from roles->groups - the
claimUsernametosub
Expand to see secret definition
apiVersion: v1
kind: Secret
metadata:
    name: oidc-auth
stringData:
    issuerURL: https://auth.mydomain.com/keycloak/realms/demo
    redirectURL: https://gitops.mydomain.com/oauth2/callback
    clientID: weave-gitops
    clientSecret: N8jDkMdghg38jiw52VHeTH1V7WUmM1tv
    customScopes: email
    claimGroups: groups
    claimUsername: sub
After this secret is created, you may need to delete the Weave GitOps pods in order to restart the app and load the new config.
Setting up RBAC
Once Weave GitOps is configured for OIDC, we need a way to map permissions to the groups. To do that, we need to create role bindings for our wego-admin group.
The following example assumes that the ClusterRole wego-admin-cluster-role and the namespaced Role wego-admin-role already exist. It will grant everyone
in the wego-admin group within Keycloak admin access. See the recommendations on setting up RBAC
for details.
Expand to see group role bindings
---
apiVersion: rbac.authorization.k8s.io/v1
kind: ClusterRoleBinding
metadata:
  name: keycloak-wego-admin
subjects:
  - kind: Group
    name: wego-admin
    apiGroup: rbac.authorization.k8s.io
roleRef:
  kind: ClusterRole
  name: wego-admin-cluster-role
  apiGroup: rbac.authorization.k8s.io
Testing the configuration
Now that everything is set up, let's test our configuration.
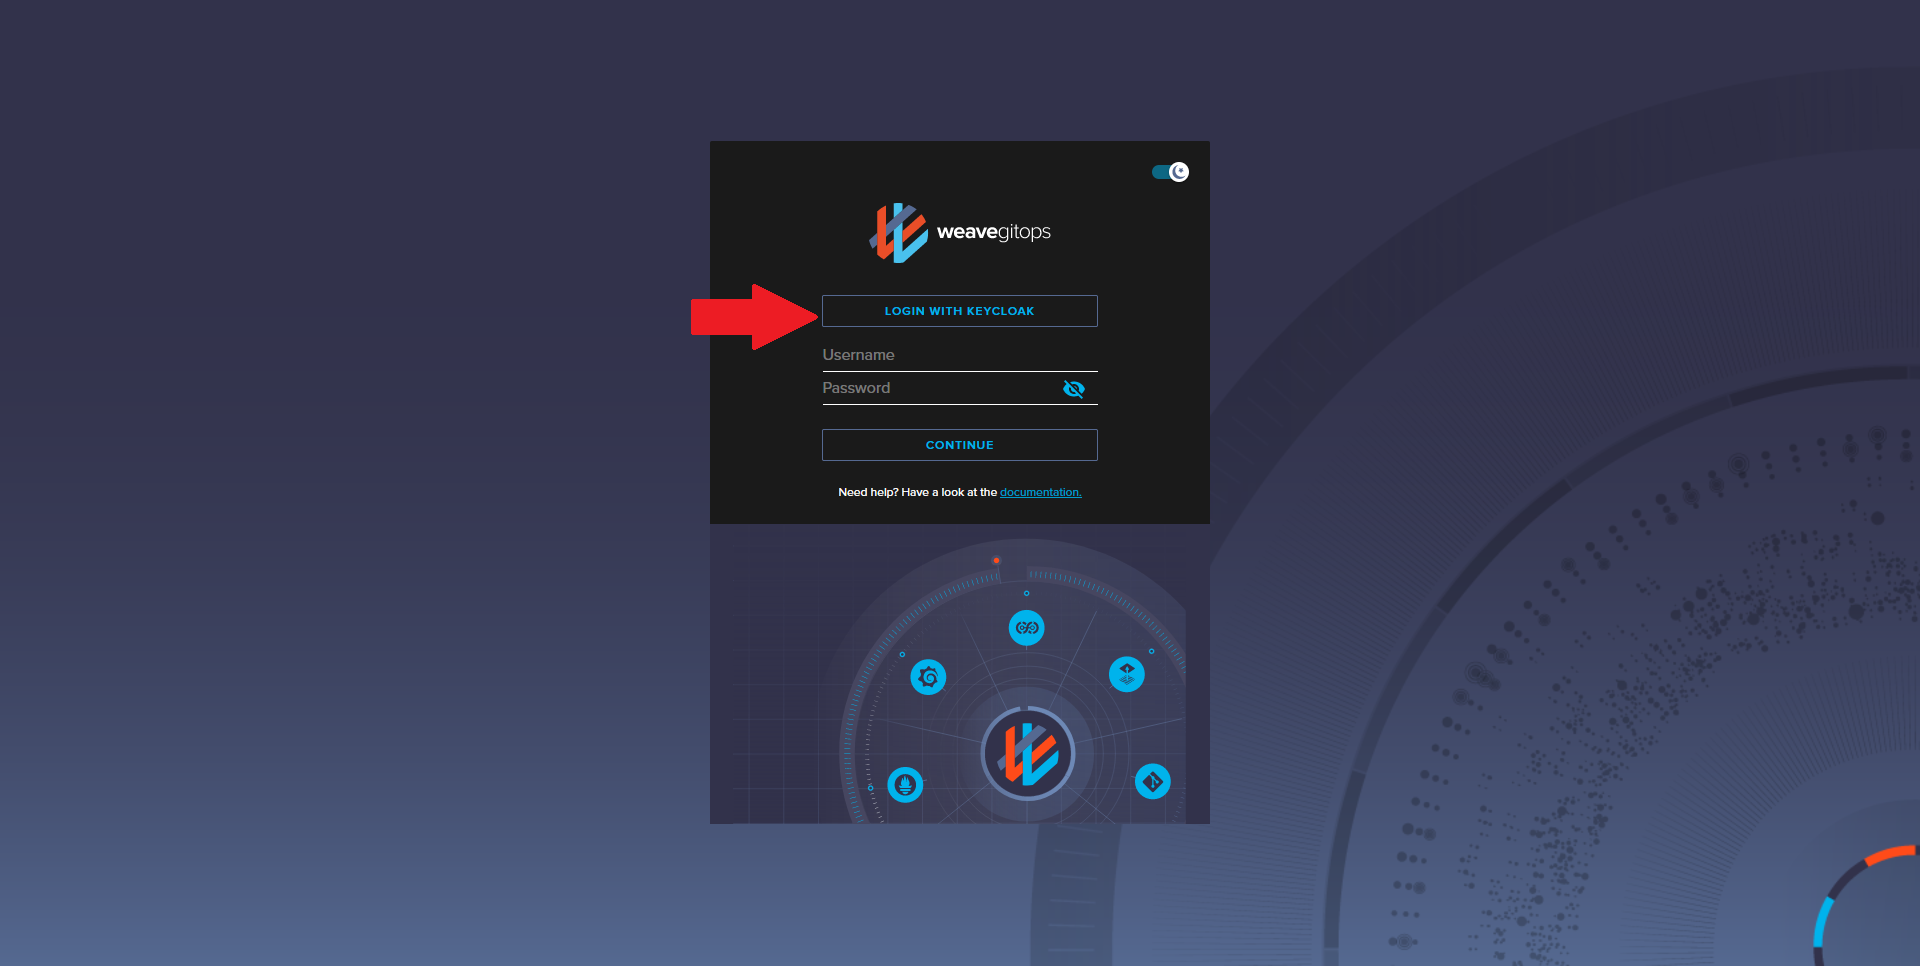
Navigate to your Weave GitOps dashboard URL and click on the Login With Keycloak button. You should be redirected to a Keycloak Login page.
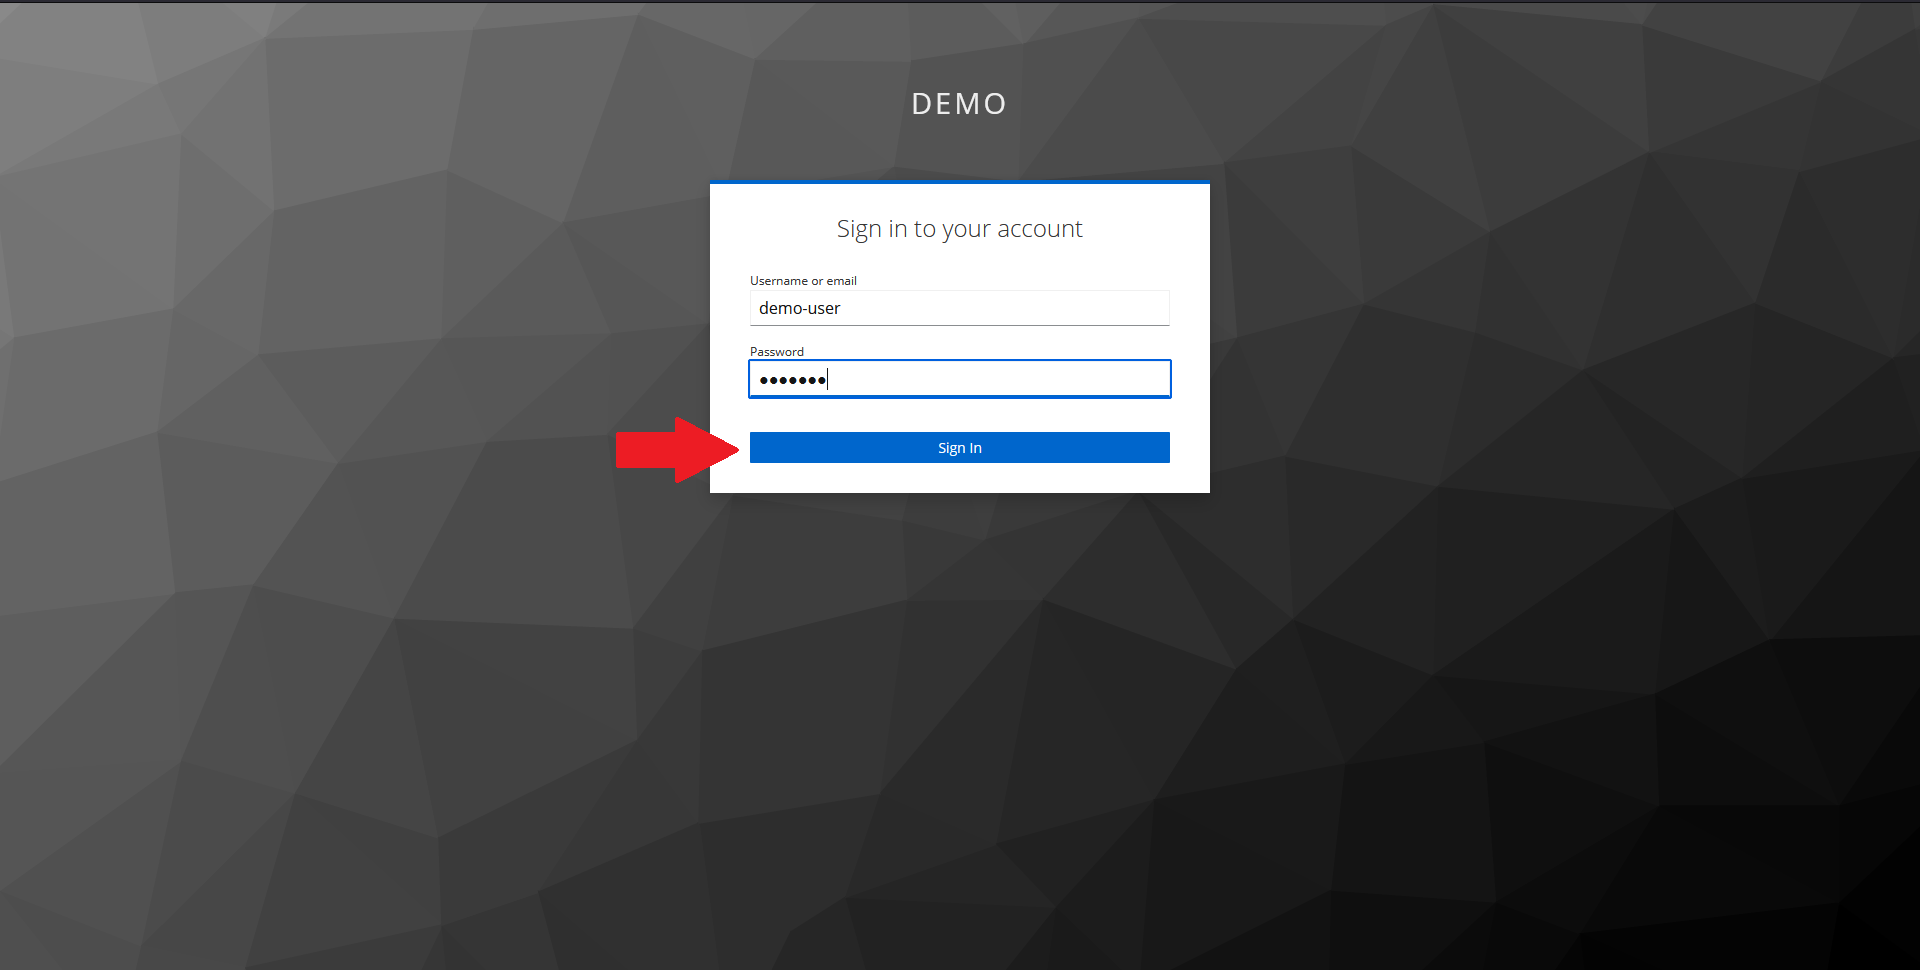
In the page that opens up, input your demo user credentials and click on Sign In.
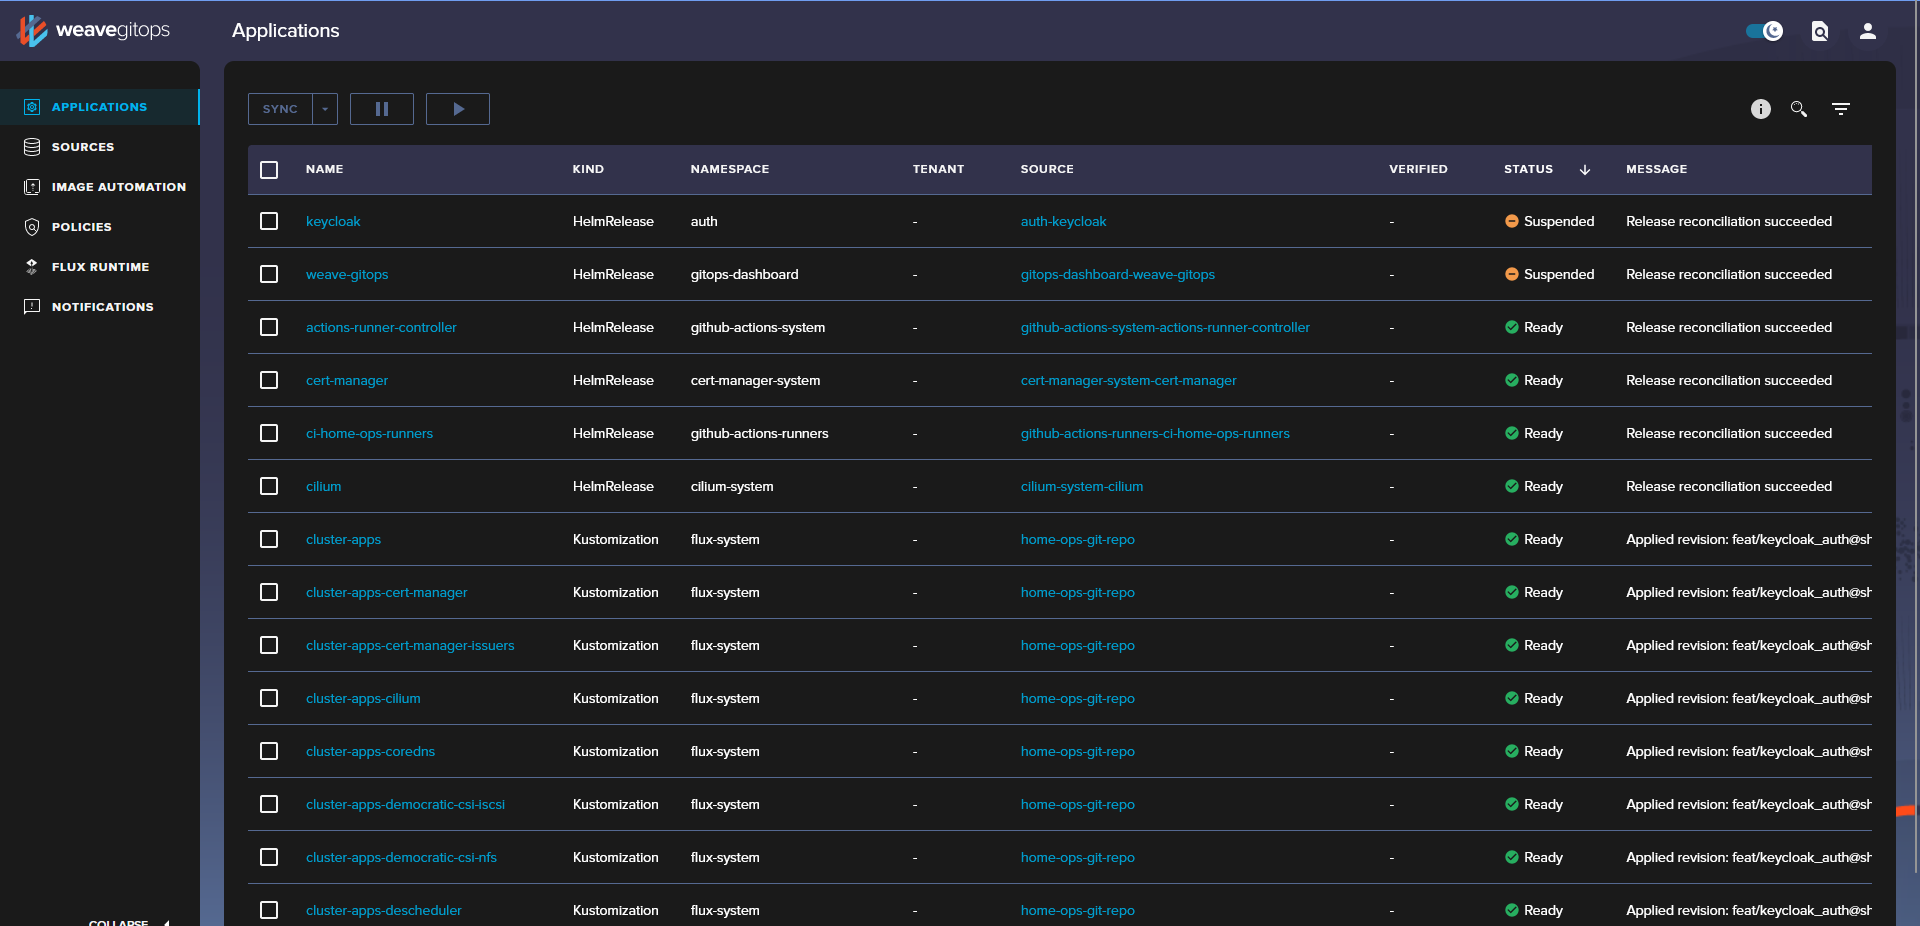
You should now be redirected back to Weave GitOps and, thanks to the RBAC configuration, you should now see all of the configured applications.